
Games
3D Printing Sega Keys
My Naomi Universal cab came with only one key, and that sort of bothered me. If I lose it, I’m drilling out the four existing locks, and I’d rather not.
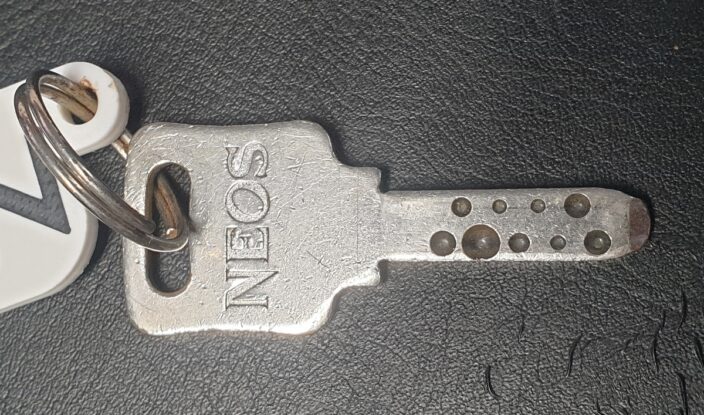 The NEOS K0001
They key it came with was a NEOS K0001, which is a very similar key to the Sega 55xx series keys. Double sided, 9 holes per side. It’s not super small, but on the scale of 3D printing it’s pushing the limits, I think.
The Process:
 Tracing the key in Inkscape
1. I took a photo of it, loaded that photo into Inkscape, and traced it.
2. I measured the key with calipers and scaled the inkscape drawing to the right size, then
3. measured all the drawn bits to get a handle on the size of the key, the pits, etc.
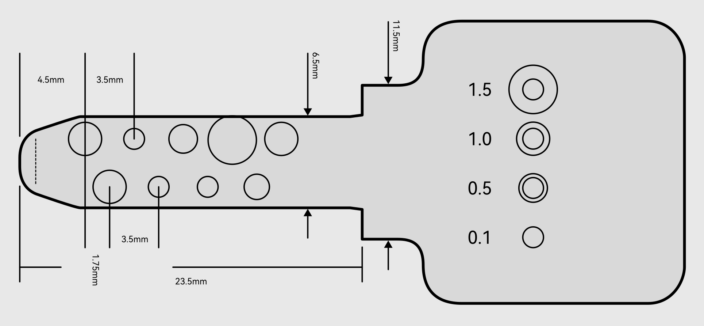
Coarse measurements were easy. The blade was 2mm thick, 6.5mm wide. The pits were 3.5mm apart along the blade, the first was 4.5mm from the tip. Both rows are 1.5mm from the sides.
At this point I was rounding things to the nearest half mil, and it seems to have worked well. I reasoned that the pit width wasn’t important, but the depth would be. I had a broken IC socket with tiny metal legs handy, so I put a leg in the pit on the key, and marked it with a sharp blade, and used the calipers to estimate the depth. They seemed to range from 1.5mm to an impossible to measure shallow depth, which is probably a zero pin, and I figured 0.1mm would be fine. The key had a small indent for those shallowest pits that was as good as zero to the pins in the lock, I’m sure. The other two depths I found, were 1mm and (another guess) 0.5mm. Four depths total.
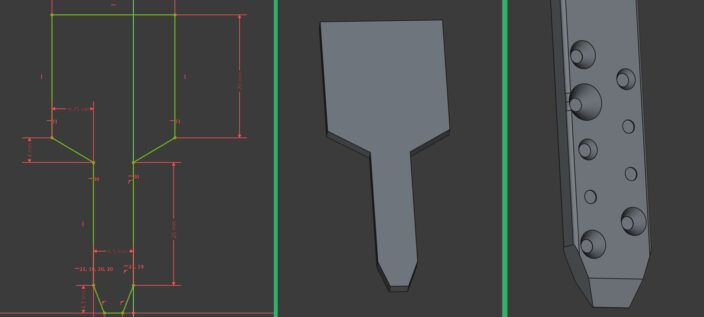 Drawing the key in FreeCAD
I took my head full of measurements and fired up FreeCAD, and started drawing. I outlined a simple key, and started putting in the pits. I did four drawings per side, each a series of 1mm diameter circles with the appropriate depth. Once they were etched into the blade, I beveled the sides at a 60 degree angle, which seemed to match the original hole sizes when done.
A few chamfers, a few fillets, and done.
I didn’t want the key to snap off in the keyway, so I went with PETG filament. It’s more flexible, and I figured it’d bend before breaking and I’d be able to pull it out without causing too much trouble. Unfortunately, at 2mm thick, it’s too flexible and if there’s any resistance at all, it ain’t gonna turn the lock.
Refinement:
The two test keys worked first try. I used a small drill bit to clean up the pits, but the size and depth weren’t adjusted before testing. The collar was too far back, allowing the blade to enter the lock a little too far, but pulling it back a half mil was perfect, and the lock turns with zero effort.
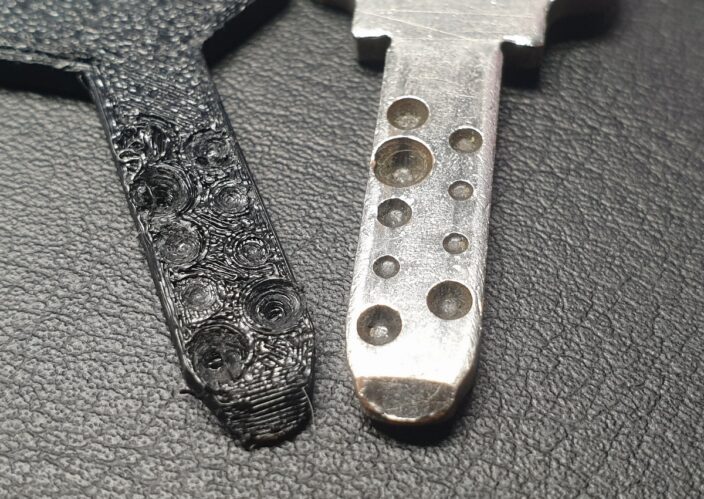 The PETG filament at 0.1mm layer height
It looks a bit stringy up close, but it works well enough. 0.1mm layer height, with a 0.2mm head. By reducing the layer height to .05 I managed to get better results, though there’s still a noticeable lack of clarity on the pits. When I shifted to PLA I got much better results in clarity, but at 2mm thickness there’s still not much in the way of torsion strength. Maybe putting a metal layer halfway through would help, maybe it’s pointless, IDK.
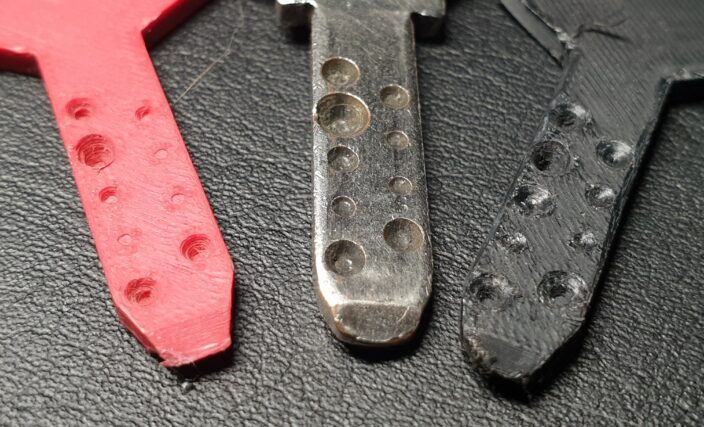 PLA Matte Red at0.05mm layer height FTW
But ultimately, I learned that I can duplicate a key with a good photo and one good measurement. And now I’m slightly less worried about keys for the Naomi Universal Cabinet. ^__^
Here are the dimensions as I understand them:
--NFG
[ Oct 3 2024 ]
| Next Post | Navigation | Previous Post |
|---|


Name:
Email:
Website: