
Hardware
Car Stereo Hacking (again)
You might remember I hacked up the stereo in my car a while back (but you probably don’t). Long story short, my new-to-me Honda CR-V had a steering-wheel stereo control that used two wires to communicate with the stock head unit. The replacement Pioneer deck also used two wires, so I gutted the stock switch assembly and replaced it with Pioneer-friendly components, and added a couple of new buttons to make track selections.
But the Pioneer stereo was a hideous heap of steaming shit, and I have replaced it with a 13-year old Sony WX-7700MDX head unit. The sound quality and features from this 13 year old deck are leagues better than a modern Pioneer, and while I lose the USB MP3 playback and Bluetooth capability (and do not let anyone tell you Bluetooth is good enough for music, it’s just fucking not) I’m gaining front and rear stereo pre-outs, and dual sub pre-out. Both decks have AUX inputs, but the new deck also has CD and MiniDisc, it dims when the car lights come on, and it has a mute wire if I can find a retro bluetooth phone box as well. It was 85,000 Yen when it was new, which was about $1020 US at the time. So it was not a cheap deck.
And it looks fucking brilliant, I mean look at it.

It sort of reminds me of a game….
All those light elements, which have 256 colour LED backlights, animate and swirl like a pinball machine, it’s fucking amazing.
Anyway, today’s goal was to re-re-purpose the steering wheel controls. The problem was the remote for the Sony was an infra-red unit. There were several options available, foolishly I went for the RM-X6S Rotary Commander. It looked great, and I fondled it in my mind until it arrived and I opened it up and it was fucking huge and there was no way it’d work well glued to my steering wheel and so I gutted the fucker.
Opening it was a bitch, but if you ever want to know how, you can disassemble the RM-X6S by sticking a screwdriver or whatever between the IR-transparent main layer (the black bit with the volume marking) and the layer below it. Once that pops off you can disassemble the rest fairly easily.
Inside it had two PCBs, and a hundred other components:

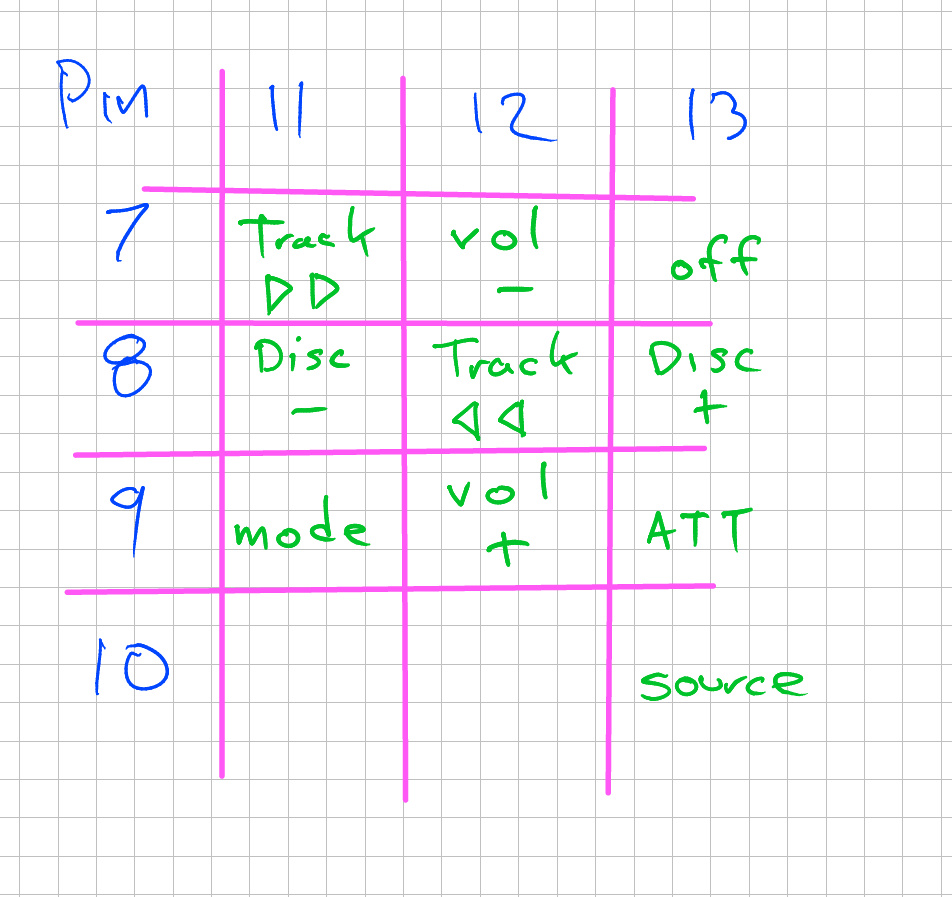
The important parts are the two PCBs. The rest of it is basically useless. With my trusty multimeter I traced out the buttons:

I found, to my dismay, that it used a matrix signalling system, so that its ten controls used only seven wires. This was significantly trickier than the existing steering wheel controller which, like most circuits I work on, has a single ground and one return wire for every button. It trades signalling simplicity for more wires. Matrix signalling was far more efficient, but when I’m running wires back and forth, it becomes much more complicated.
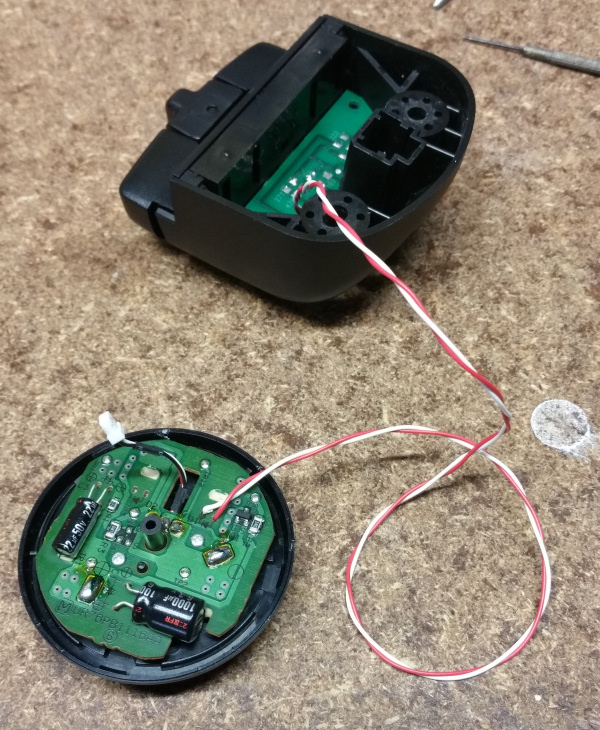
And how to aim the infra-red lights at the stereo so it’d respond to my demands? I pondered a bunch of things, rather than run new cables (which wouldn’t go through the steering assembly gracefully) or drilling new holes in the steering wheel controller (which would then aim the lights sideways, potentially missing the stereo, or be blocked by my hand, or be aimed the wrong way during a turn etc etc). I wanted to use the existing two wires that connected the steering wheel controller with the stock and Pioneer head units. It was wired up by Honda and I knew they worked… But the two PCBs were connected by -three- wires. Power, ground and the signal. The smaller board does all the work, taking power from the larger board, running the micro-controller, receiving the user inputs, and sending the infra-red signal back to the larger board, which had – basically – only the battery and the infra-red LEDs.
So without that third wire I had to give up the idea of putting the IR transmitter behind the rear-view mirror or wherever. The two PCBs were far too large to fit inside the steering wheel controller, but after some investigation I found that there was a small removable panel at the bottom of the steering wheel, which was -just- big enough. So if I could put both boards and the battery down there, I could run the 7 wires I needed through the wheel to the controller… But what about the lights?
I figured I could remove the lights, the two LEDs shared the same circuit, so that the signal was sent to both. Only two wires required. Ding!
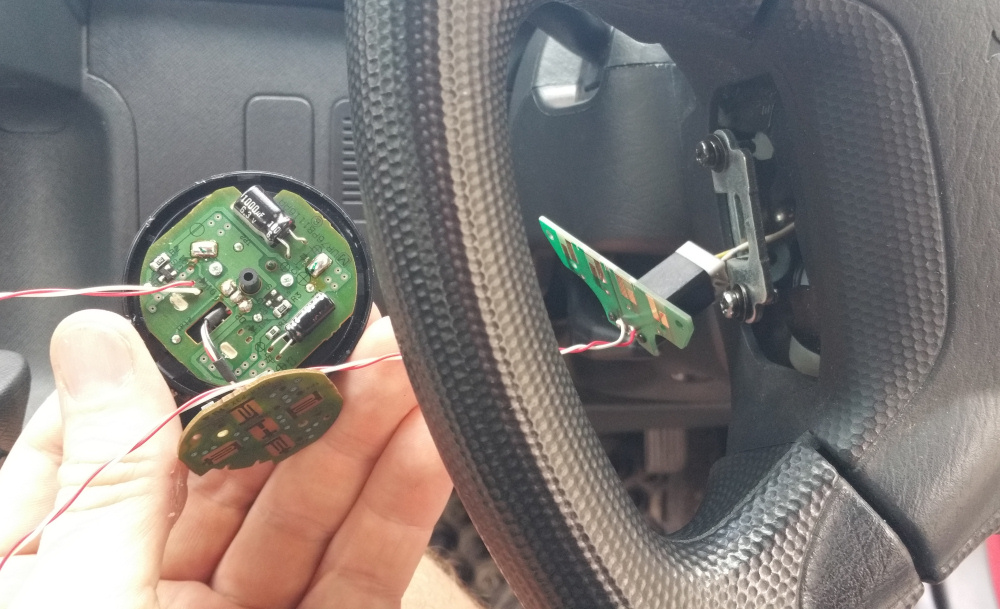
So I removed the two LEDs and wired up two new wires that went to the existing steering wheel control unit, which was then passed through the wheel to the cavity behind the head unit, where I had installed a 3.5mm headphone plug compatible with the Pioneer.
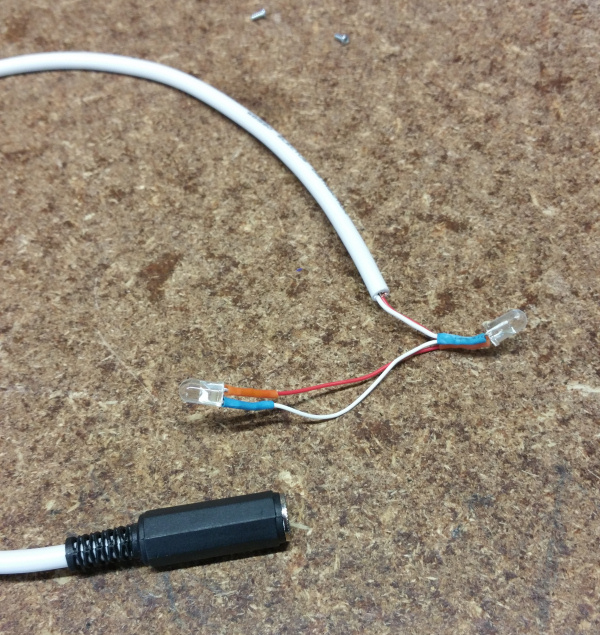
From the factory wiring to the headphone connectors to the LEDs
I connected the two LEDs to a 3.5mm socket via 20cm of wire, so they simply plug in to the existing wiring, and send their control beams straight at the driver and passenger, and reflect back to the stereo. I wasn’t sure the extra meter or so of wire would allow the LEDs to signal properly, but it all worked when I tested it.
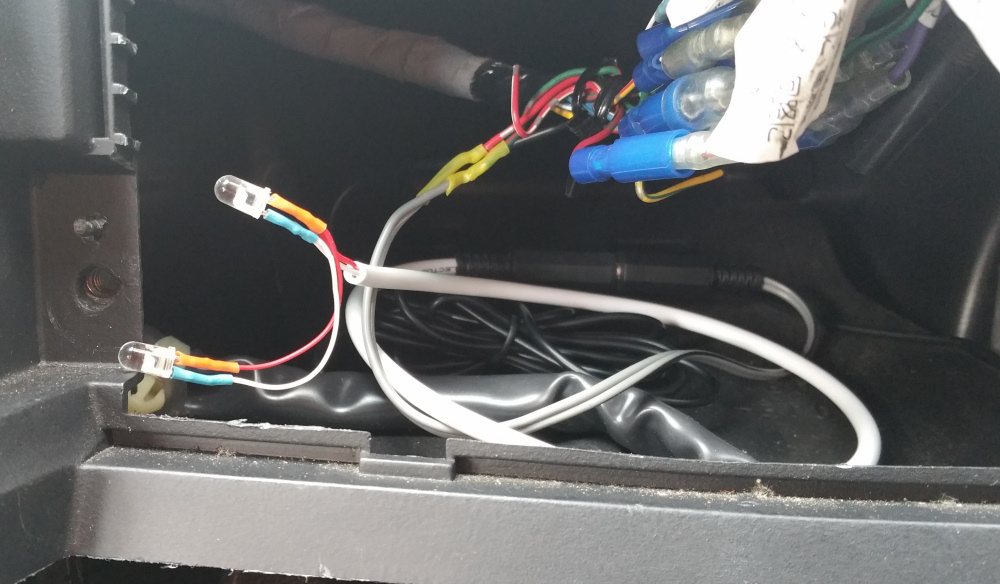
The test rig
Once I determined that it’d work (and it was a bit fiddly, for some reason it kept failing to work until I turned it all off and unplugged and re-plugged it again) the tedious process of wiring up that complicated matrix could begin. Update It turns out the deck I was using was defective, and would become unresponsive to -all- inputs a few seconds or minutes after powering up. I’ve since replaced it with one without these problems.
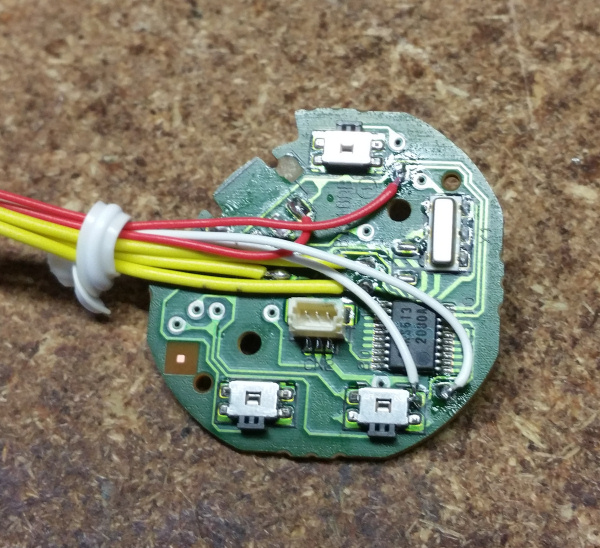
This is the little PCB, with seven wires soldered on:
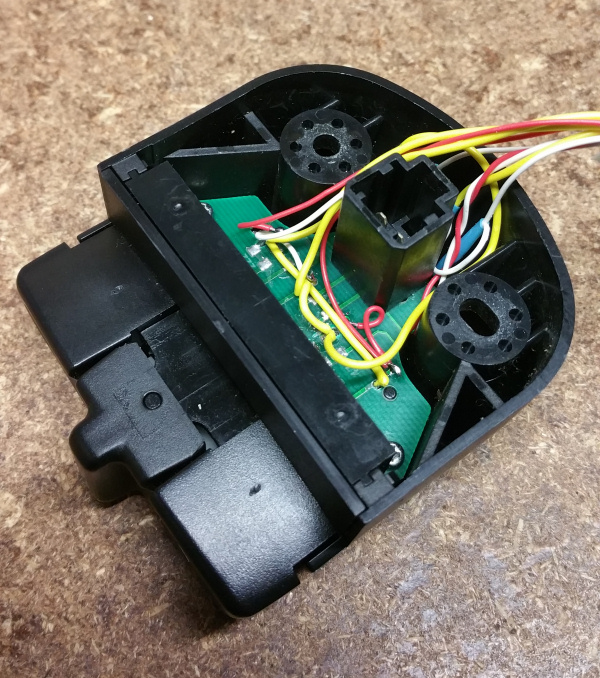
And here’s the inside of the steering wheel controller:
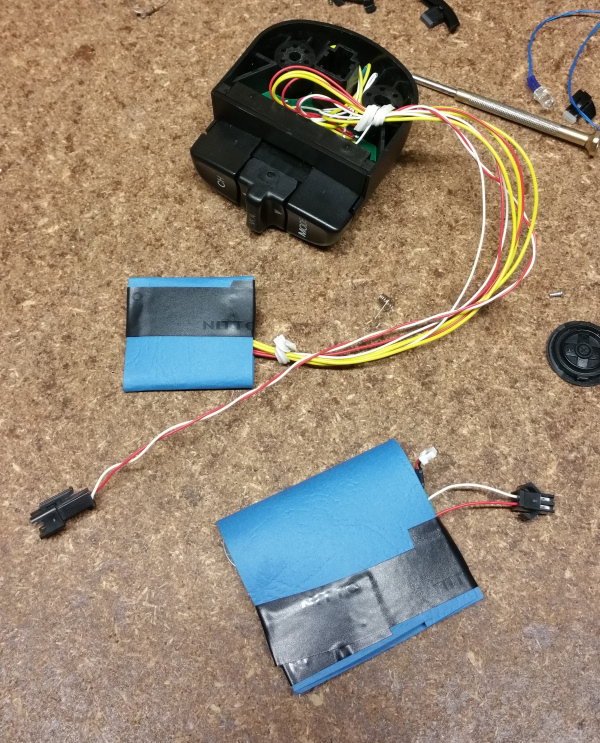
This is the final assembly. The small PCB can be shoved into the steering wheel through the controller opening, but the large one won’t fit, so I had to separate them. The two wires for the LEDs now have a plug to connect them, and the two PCBs already have a plug to link them together. I cut a small hole into the paper envelope so they’d plug in more easily, but you can’t see it here. The battery was soldered permanently to the larger PCB, when it dies I can remove it easily (the steering wheel panel comes off and the two PCBs disconnect without tools) and solder a plug onto it…
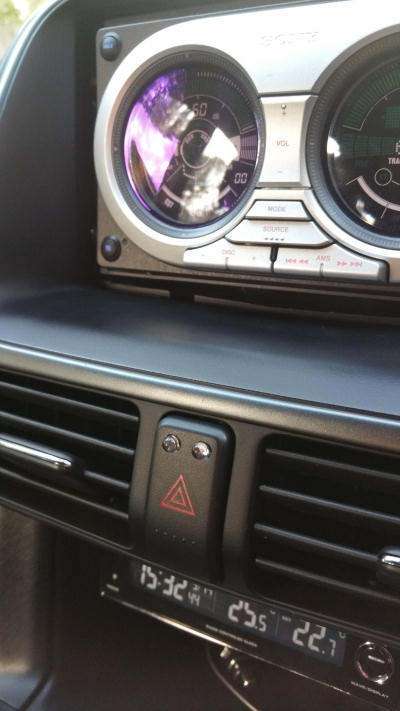
The final step, assuming it all works tomorrow in the daylight when the sun’s wreaking the most havoc vs infra-red remote controls, I’ll be mounting the LEDs permanently. It seems like there’s enough space in the hazard light switch to drill a couple of holes… ^_^
Fun stuff. I fucking love MiniDisc. It’s too bad Sony are idiots.
Good stereos though.
--NFG
[ Sep 13 2015 ]
| Next Post | Navigation | Previous Post |
|---|
Comments
NFG
Sep 14 2015
And done. I put the LEDs in the hazard light switch:
Ross
Oct 22 2022
Just picked up the wz 7700mdx and rm-x6s to fit into my 1991 toyota sera. Very glad to fid this guide and hats off to you for documenting and posting online. I wish I could use my old rm-x4s with it (I have 3 of them) bit hopefully the ir unit will do the job. I wouldn’t have the skills to do what you have done however, even with your detailed guide. Thanks again for sharing. Ross
Name:
Email:
Website:


NFG
Sep 13 2015