
Hardware
Cactus Radio Trigger for Ricoh Theta S
Recently I picked up a Ricoh Theta S 360-degree camera. You can read my experience with the Theta S if you’re curious. It’s pretty cool and Ricoh has been good about supporting it with different ways to use it.
One of the things I picked up for it was the CA-3 Cable Trigger which allows remote triggering of the camera via USB cable. For a few reasons this was a desirable function, and I’m pleased to report the CA-3 works fine. It is, of course, limited to the length of your USB cable, and sometimes you want to get farther away. Like, real far. Like a hundred metres, maybe?

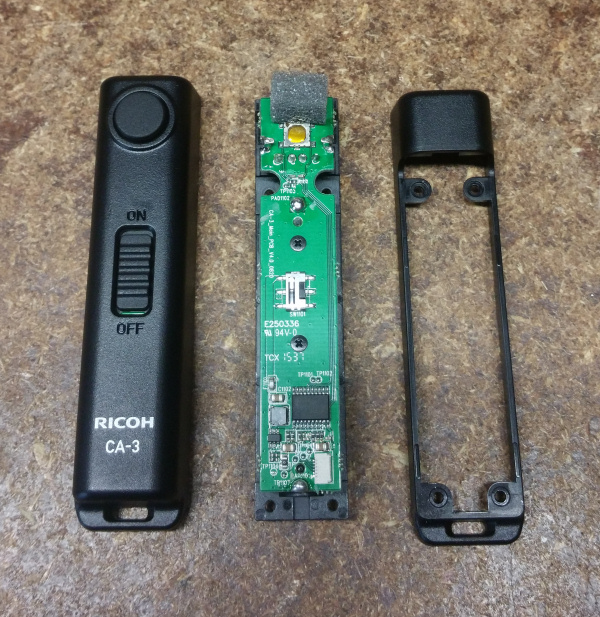
The CA-3 Trigger
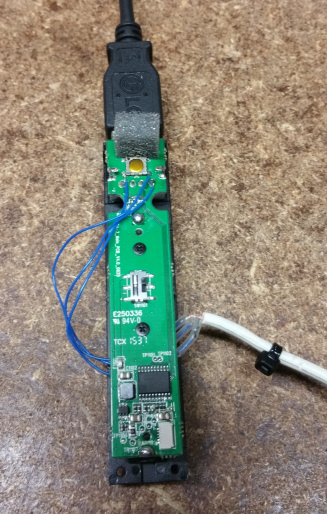
My studio’s already full of Cactus V6 triggers (Which I reviewed here) and I thought maybe I could use the V6 to trigger the CA-3 to trigger the Theta. And so I hacked the CA-3 to take a standard 3.5mm headphone plug, the same as used on the Cactus and many other radio triggers.

Half-press: focus. Full-press: release
This is a simple hack in concept, but it’s pretty dang tricky inside the CA-3. The PCB inside the CA-3 uses the smallest components I’ve ever seen, and soldering to them is probably not for shaky-handed newbs. Also, there’s no useful empty space inside the CA-3, and so I’ve got an ugly socket hanging out of the side. This doesn’t bother me overmuch, but if you want a seamless mod, this ain’t it. ^_^
Under the battery cover there are four screws. I had some trouble removing them, Ricoh puts ’em in pretty securely. Once they’re out, you’ve got three pieces to work with. The whole assembly is very clean and I have some real respect for Ricoh – they know their stuff.
The CA-3 must have a half-press and a full-press, or it won’t trigger properly. The Theta S doesn’t care, since it has no focus. I didn’t try wiring the two signals together but I suspect it’ll work fine. Here are the appropriate points on the board:
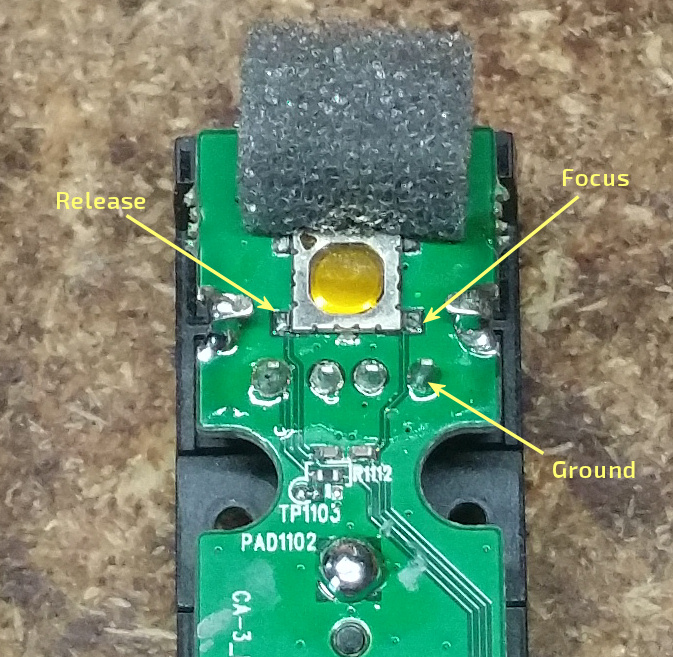
The button is a little hard to access, because of the larger mounting legs for the USB connector. If you have trouble, you can see the two circuits run down through the 4 USB pins, through two super-tiny capacitors. These aren’t much easier to solder to, but they’re a lot easier to reach, if you have trouble with the button.
Also, watch out when soldering to the button – it’s small! It seems like it’d be very easy to glop too much solder onto the connections and short out against the top of the button, which is grounded.
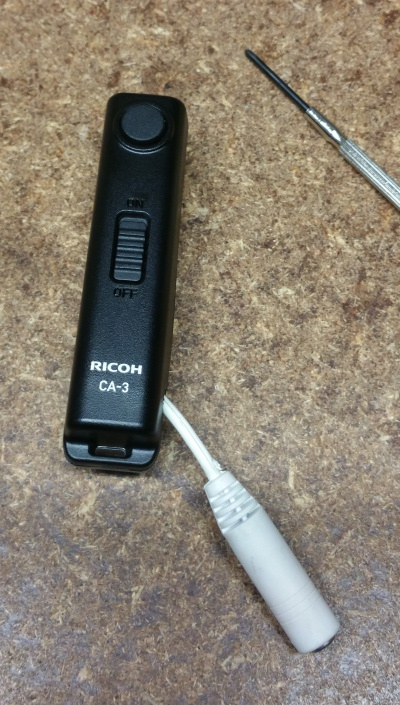
And here’s the final result. It’s not pretty, but I couldn’t find any other way to mount a socket in the CA-3 itself. It might be possible to come straight out the bottom, under the ‘CA-3’ text, but i didn’t want to sacrifice the strap loop there.
And finally, here’s a selfie, using the V6 to fire the Theta, in panorama-vision:
--NFG
[ Aug 29 2016 ]
| Next Post | Navigation | Previous Post |
|---|
Comments
Name:
Email:
Website:


Viktor
Apr 18 2017