
Hardware
Build Log: Retrofitting a NeXT Cube
My current PC is nearly 10 years old. I built it c. 2011, when its i7 2600 (4 cores @ 3.6GHz) was brand new. It’s been a remarkably reliable machine for a long time, but I’m looking at a new machine now, with these lovely new AMD CPUs and all the modern accoutrements like high speed M.2 drives, more high speed USB ports, etc.
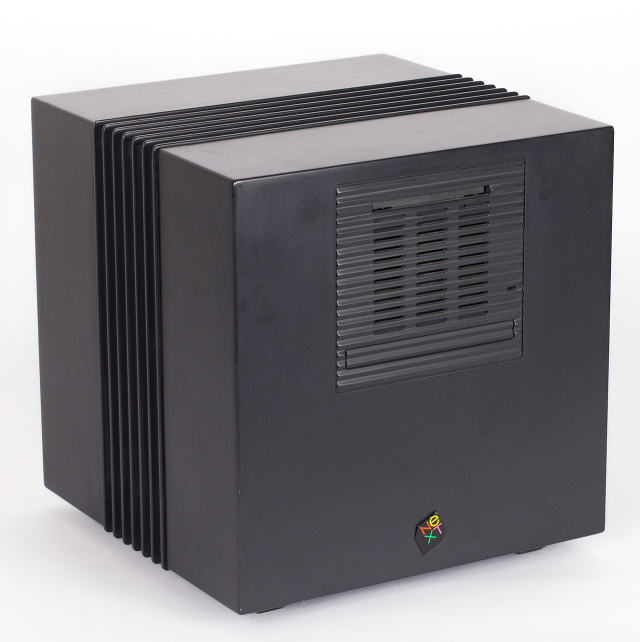
But the thing is, I want to put it in a ~30 year old NeXT Cube case. This was a working Cube but the magnesium-alloy case is all that survived the Queensland floods in 2011.
It’s a stark black beauty in contrast to do the modern glass ‘gamer’ machines, and the NeXT Cube has amazing history: DOOM was written on one, and the World Wide Web was created on one. So I’d like to give it new life.
Trying to jam the whole PC in the old case is proving to be a crazy sort of challenge. six 3.5″ HDDs, 2 SSDs, large modern video card, power supply, and cooling fans as well… I’ve been doing mental tetris for -days-.
I’m not 100% sure I can do it, but I’m ~82% sure at this point. =)
March 1, 2020
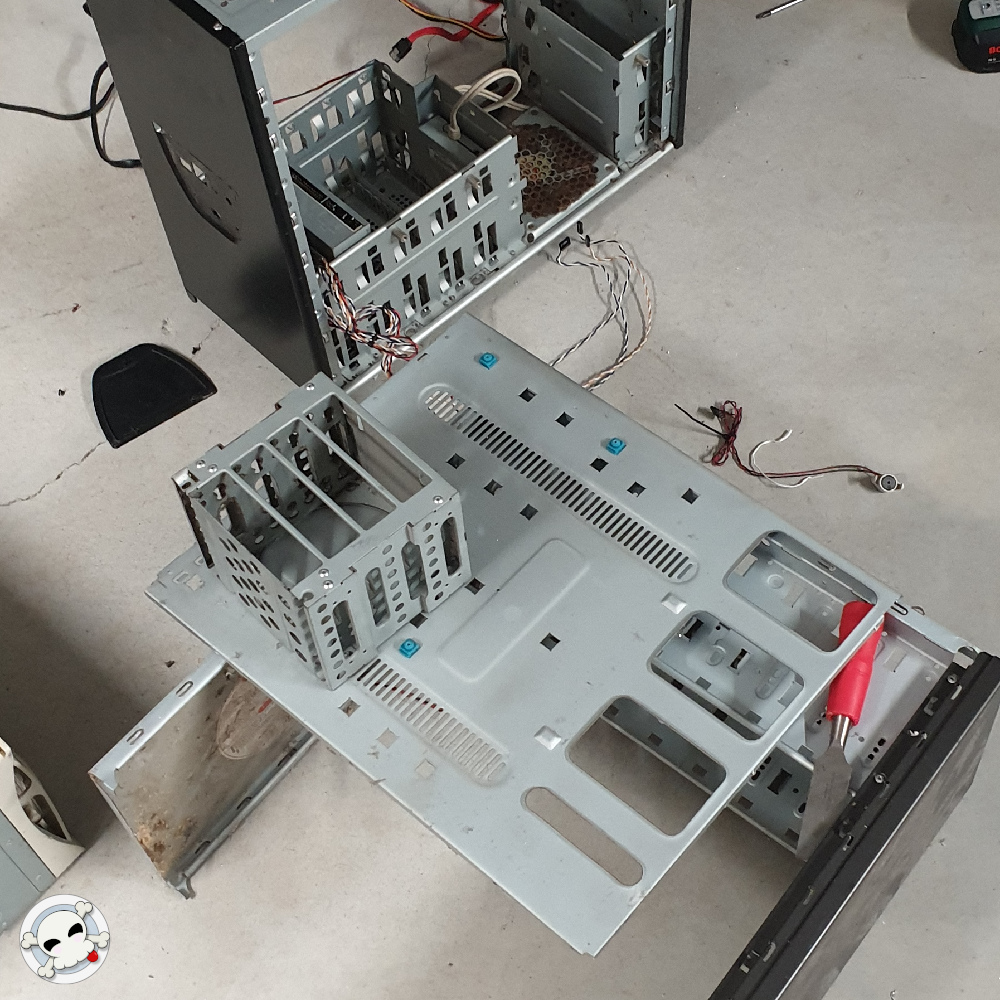
I’m like 96% sure this is going to work. The first thing I needed to know for sure was that an mATX motherboard would fit. I could have simply gone for an ITX mainboard, but I wanted something with more expansion capabilities. ITX tended to top out at four SATA ports, but mATX gave me eight. This is going to be a working computer, with 20TB of storage, or more, so drive capacity is important. I cut up an existing PC case, retaining the mounts for an ATX board, and threw an old motherboard onto it. It fit perfectly. The project is a go!
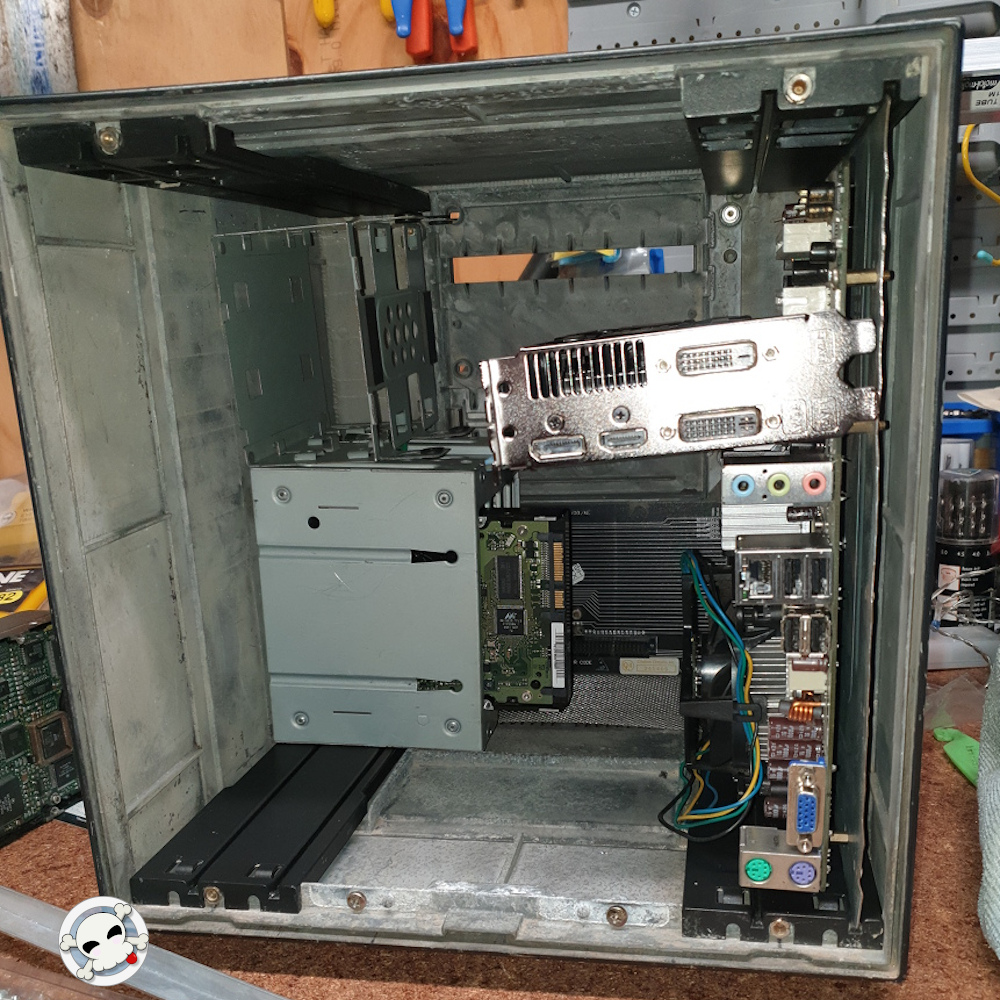
The biggest hurdle was the video card. I was keen to simplify the design by using a riser and hanging the card off the rear of the case, but that complicated all kinds of other things. Leaving it plugged into the mainboard simplified the layout and cleared up the internal airflow in a big way. If the card was vertical there was a risk of hot air pooling next to the card with limited opportunities for exiting the case.
It also gave me room to add a second 120mm exhaust fan, which should make a big difference.
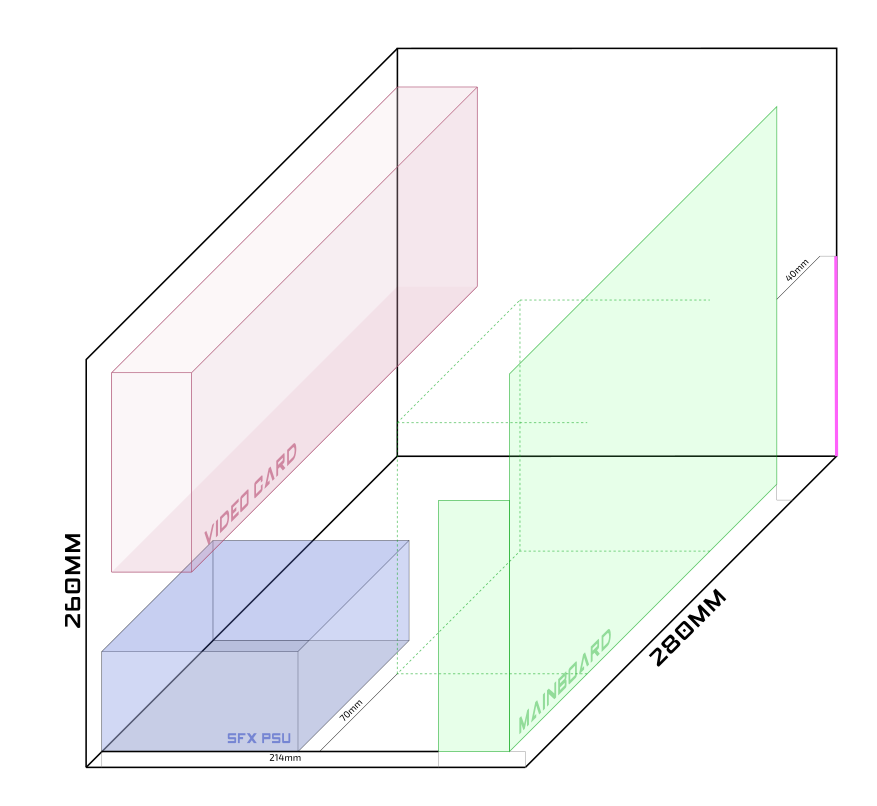
So in a a single cubic foot, near enough 30cm on each side I’ve managed to (conceptually) stuff a micro ATX mainboard, high end video card, seven drives (2 x 2.5″ SSDs not shown), power supply and two fans.
I’m still toying with the idea of a 240mm liquid cooling radiator for the CPU, which would let me mount all the HDDs in a central stack (and put the video card above the PSU), but there’s a question of the cooler’s efficiency. But it would eliminate the ugly offset stack of fans….
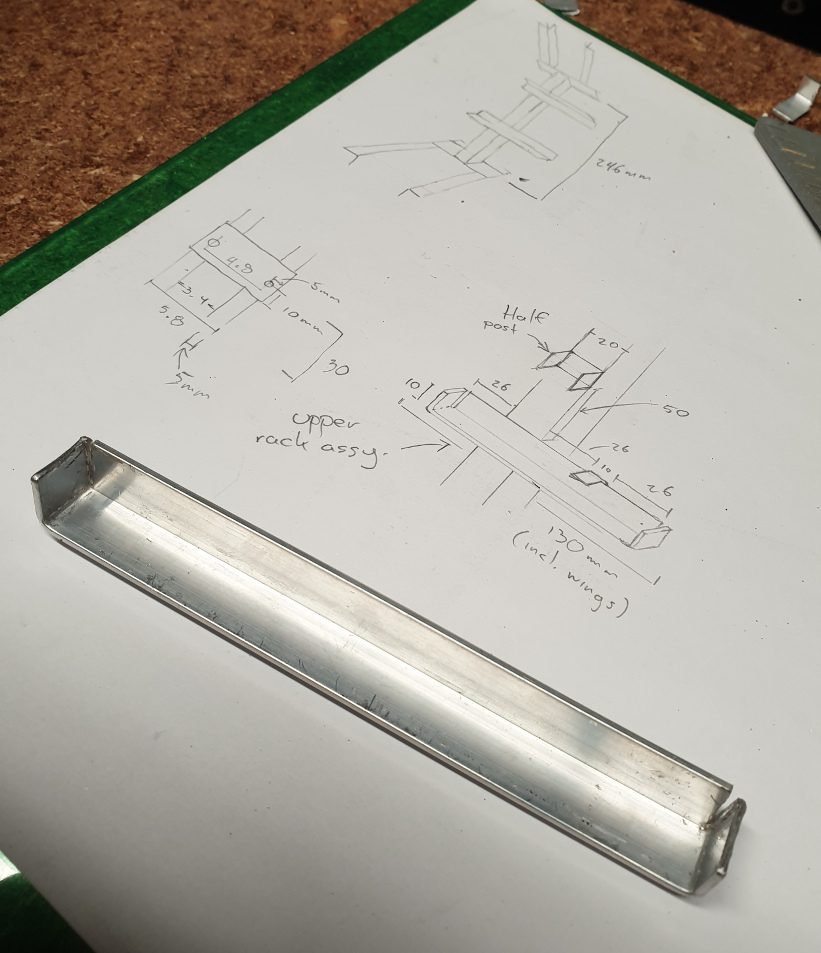
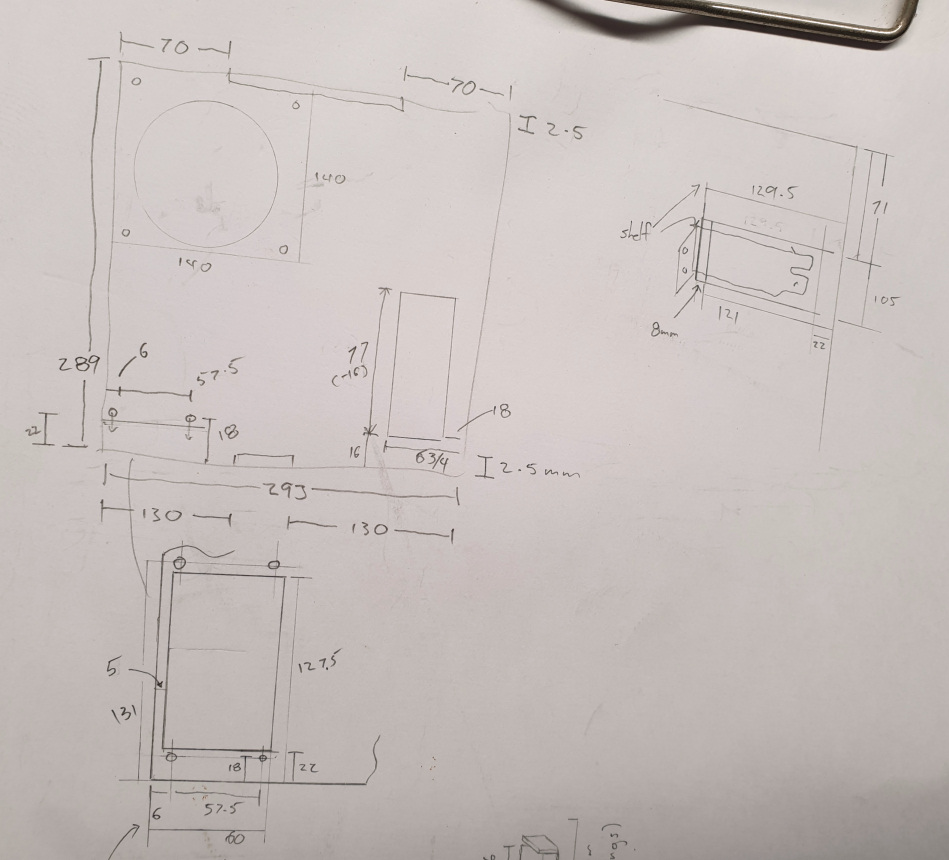
Here’s the latest drawing:
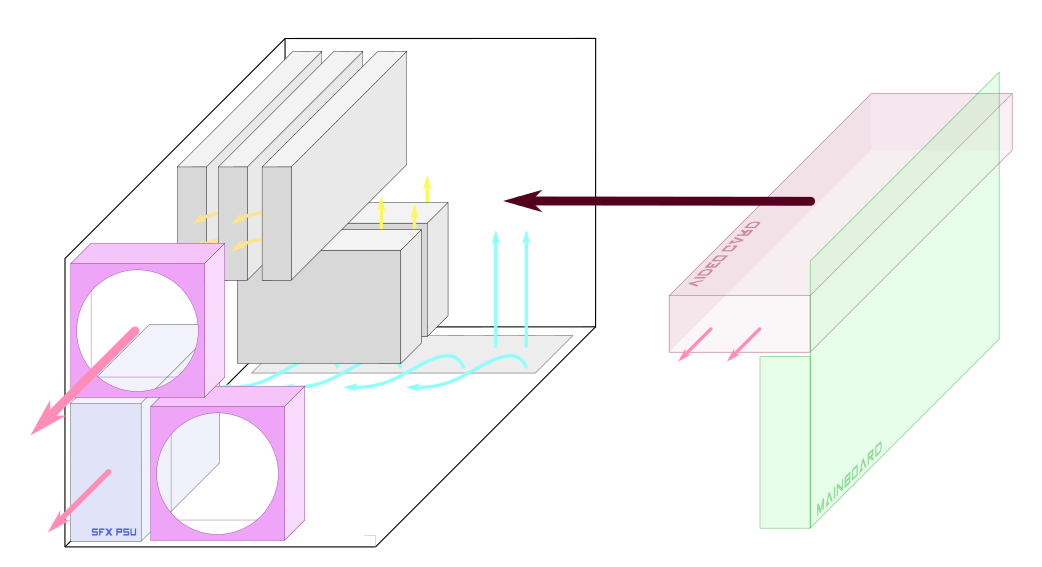
Special attention was paid to the airflow. It’s a small case, it’s easy to see how the arrangement of devices would cause hot air to jam up and allow things to stay hot. The drives are mounted vertically so that hot air can rise through the vents (the front third of the Cube is air intake) and flow more or less unimpeded through the 3.5″ drives and out the back. There’s no obvious way the video card is going to get fresh cool air but I honestly don’t even know how the air moves or where it exits yet. I’m hoping the exhaust fan pulls enough air out that the card can’t help but see airflow. A problem for future me.
March 5, 2020
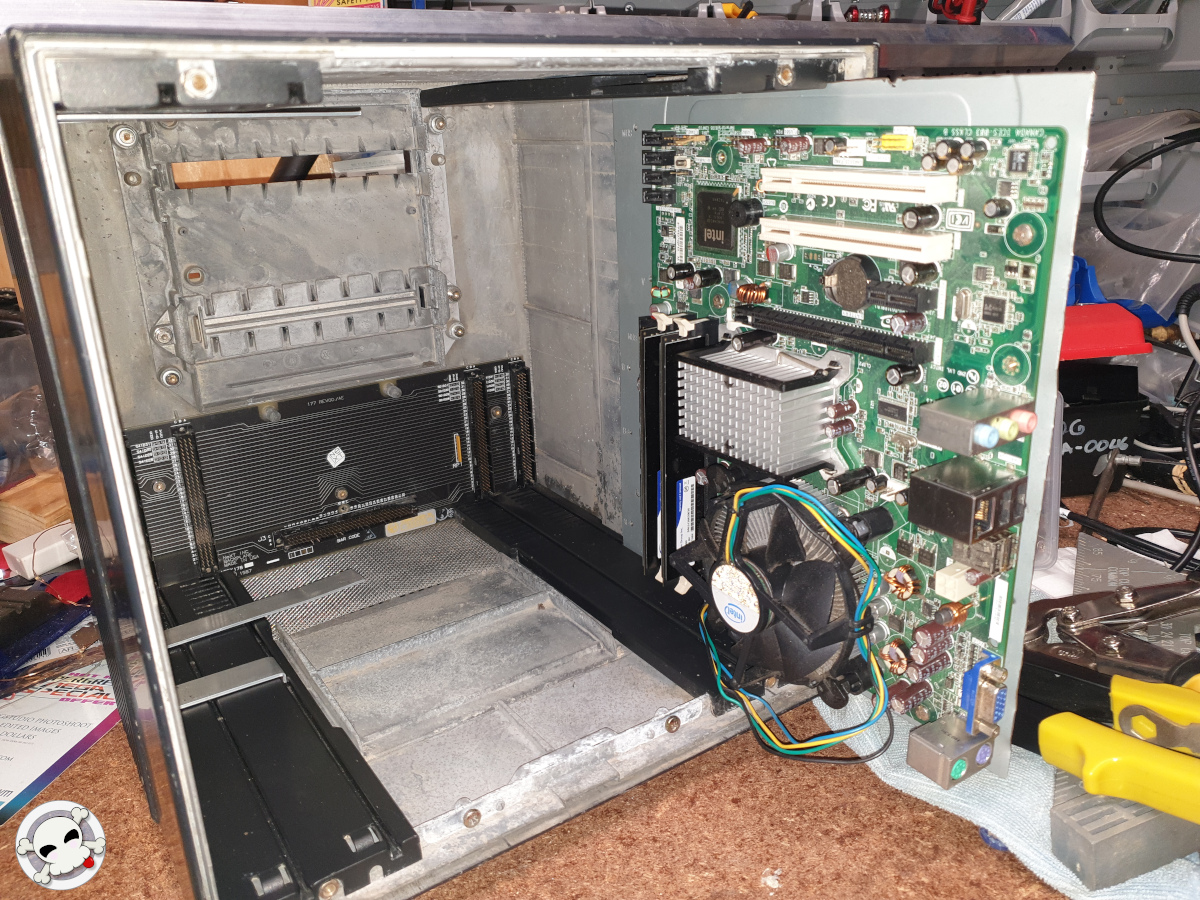
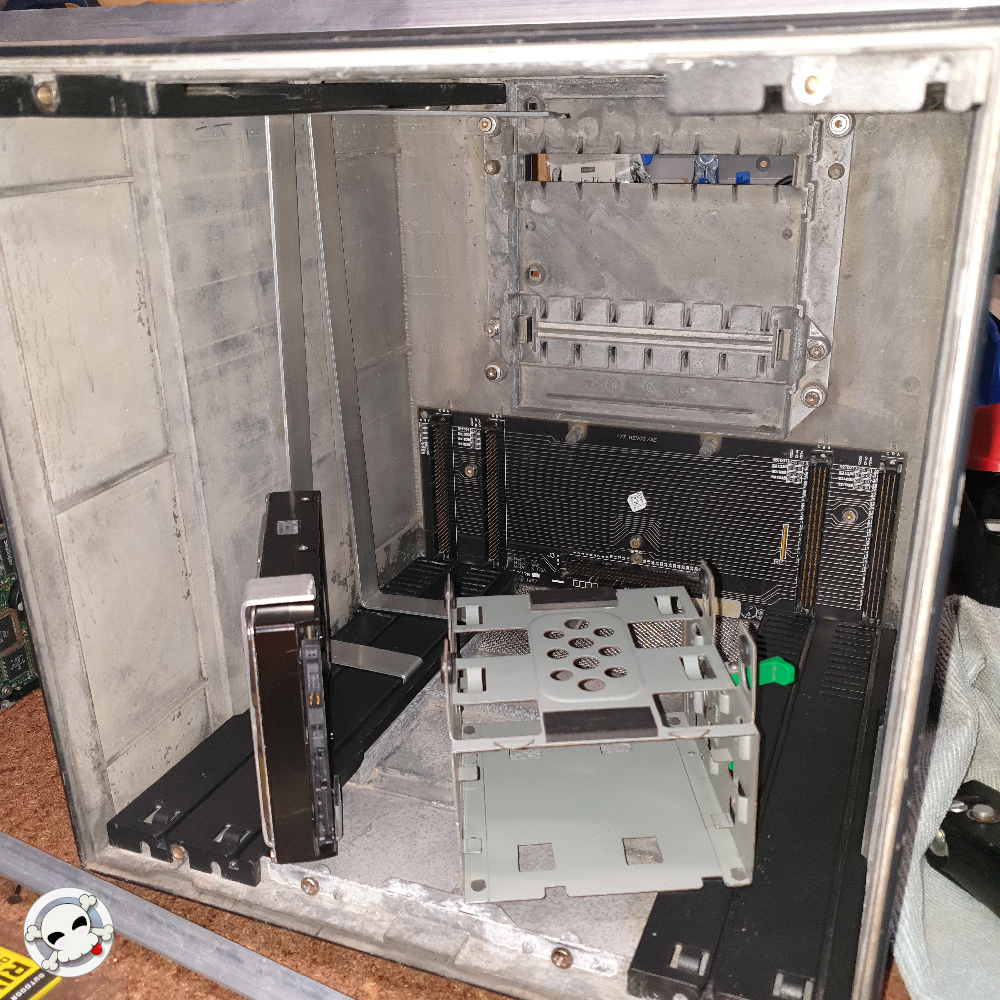
Progress on the NeXT Cube project came to a shambling halt a couple of days ago, as I struggled to find a way to assemble the drive cage. I knew where the drives needed to go but could not figure out a way to mount them securely. There’s precious few internal mounts in the Cube. It was designed with an incredibly elegant layout, with the power supply and up to four boards (be they complete NeXT Mainboards or expansion cards etc) sliding in on rails and connecting to a backplane. It was 100% incompatible with ATX computer components.
So, none of that elegance was useful for this project. I had four sliding rails and the back panel and that’s about it. There were several threaded mounts up front, but they were for the front panel cover plates. I couldn’t even remove the backplane PCB because it holds the rails in place.
I went through a hundred mental mockups and started assembling one or two of them only to find I’d overlooked one detail or another, often for the second or eighth time.
For a while I was trying to create a frame to attach the drives to, and that was so much work with so many pieces I started disassembling old computer cases for HDD cages, but using those would take more space, destroy the airflow, or both, and HDDs make a lot of heat.
And then it struck me. After what was most of a week of struggling with it, the solution:
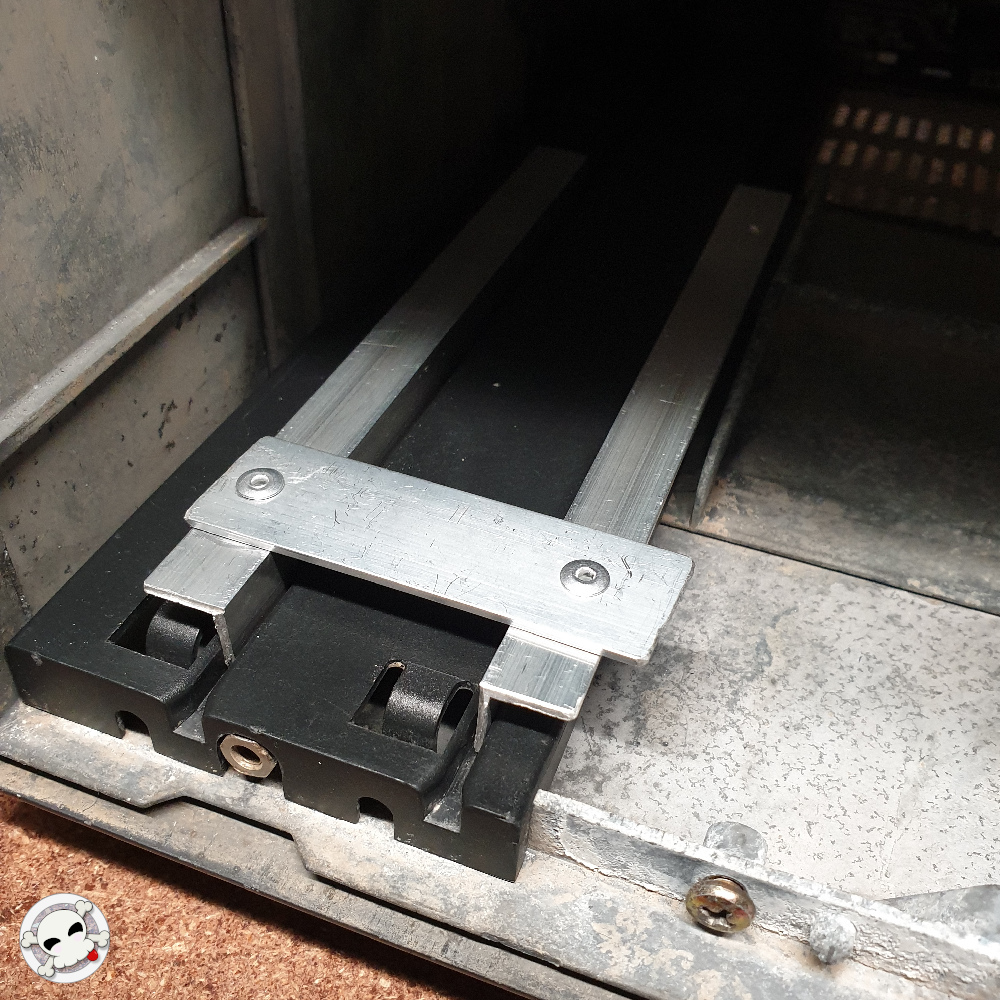
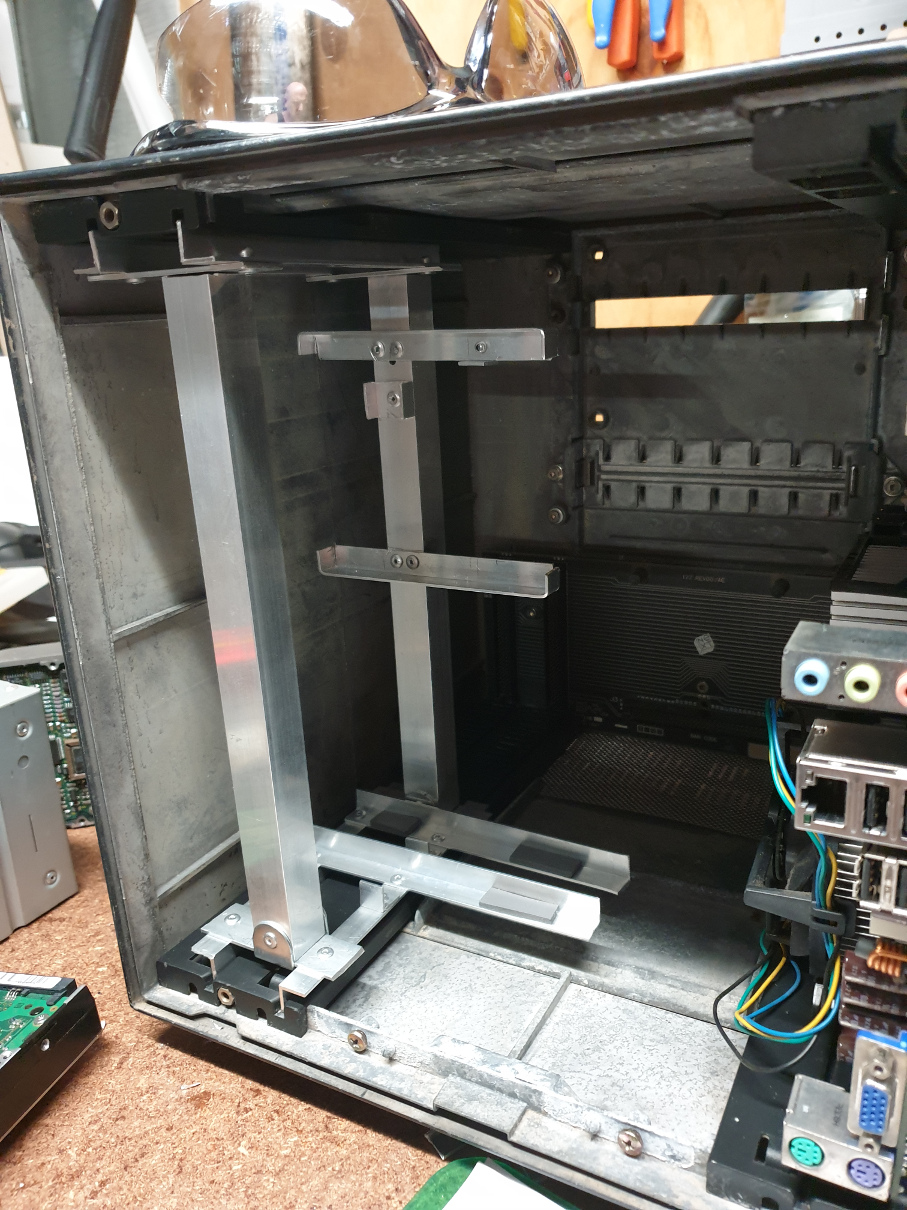
Two sleds, one on top, one on the bottom, connected by two pillars that would maintain the vertical spacing and allow me to mount the top row of drives.
I started working on it this afternoon. Sleds are done, one pillar is attached, and the two bottom drive slots are almost complete.
March 13, 2020
The drive sled is a dozen or so rivets from being complete. I’m having some second thoughts about slamming five heavy HDDs onto those plastic rails inside the Cube, but… I really don’t want to have to run all external drives. Having my world in a single box is very appealing.
Also, during the creation of the sled I expanded its dimensions a little bit to allow for cable routing around the perimeter of the Cube (for better visuals and airflow) and the sled is now really close to the SFX power supply, to the point where I suspect it’ll impact the cables as they exit the PSU.
The planned 140mm extraction fan gives me literally zero space between it and PSU and I’m not super confident I can fit them, so the PSU might have to rotate and that might impact future CPU coolers… A problem for future me, I guess. I could run 120mm, but no! I am stubborn. As an aside, do you know how hard it is to find the size of an AMD Wraith Prism cooler online? I had to have a friend measure his. (Answer: 120mm from the mainboard, but I can’t remember if that’s the measurement or the ‘plus extra’ margin for error I used…)
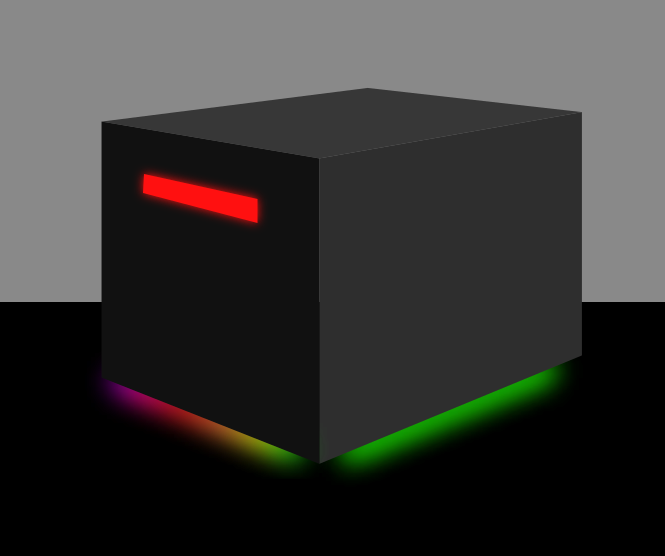
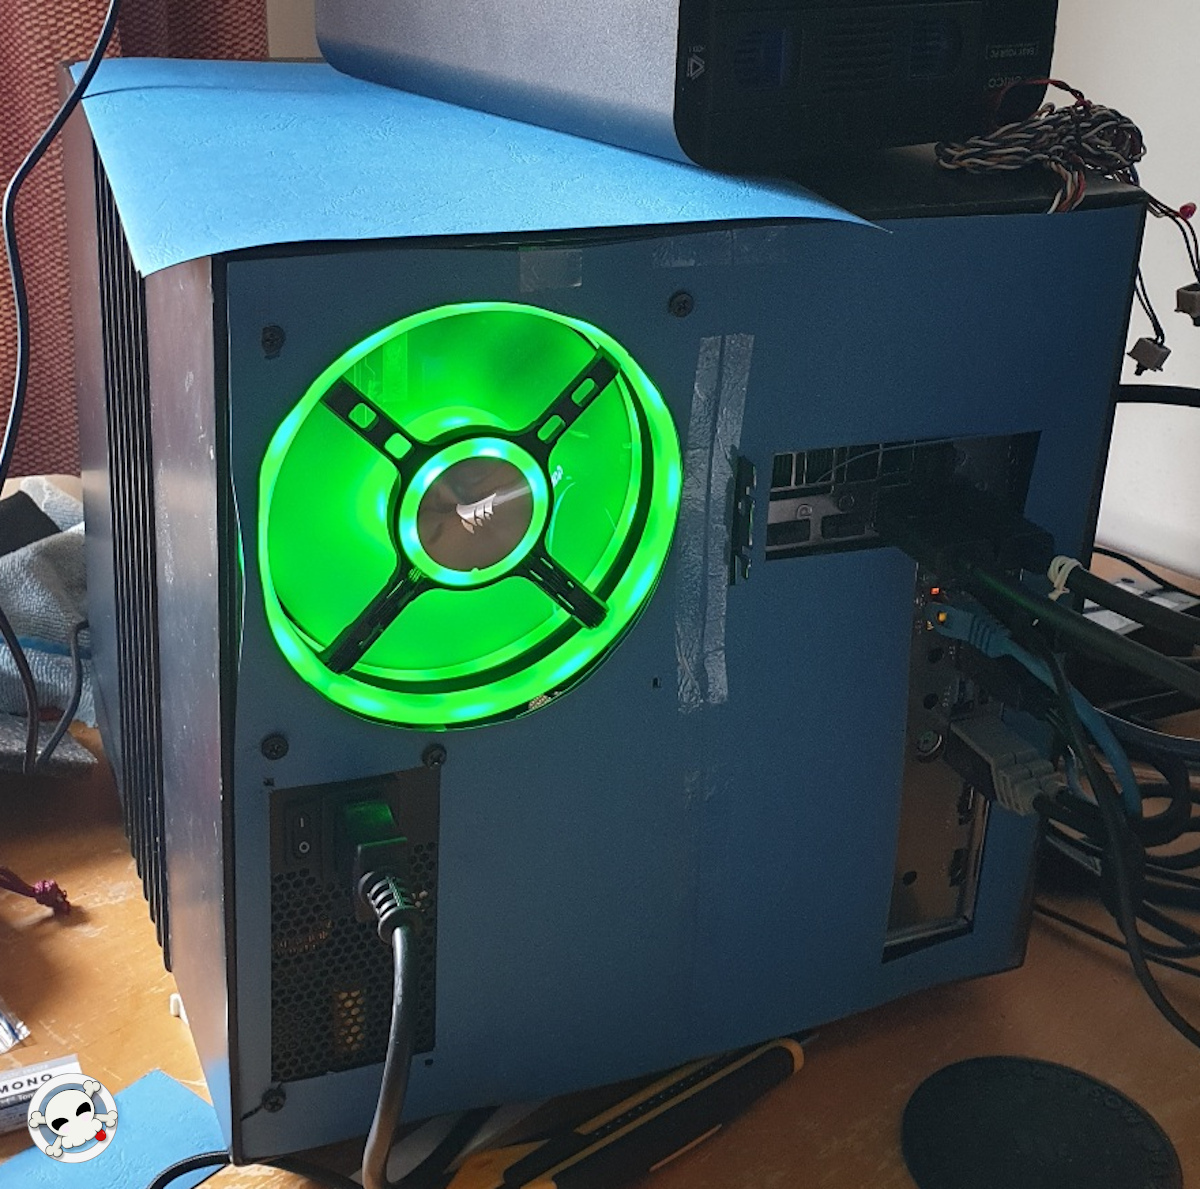
One RGB fan behind the box and 3 RGB strips below, and one last strip illuminating the empty CD ROM slot should really make this project look the business. =)
March 23, 2020
Progress on the NeXT Cube has resumed now that parts have started arriving. So far only the PSU and mainboard are here, but that’s most of the rear panel gear. Then the fan and video card, and I’ll probably add some extra ports for extra USB etc.
The 650W SFX PSU from Silverstone is incredibly small, I am amazed. It’s one thing to know its dimensions and do the 3D Tetris, but it’s something else to hold it in your hand. Wow, tiny!
Now the the mainboard is here I can finally start measuring up the ATX IO panel. I did all the measuring: PSU, video card and IO panel, and I’ve drawn it all up to scale with Inkscape.
When the fan gets here I’ll know for sure if it’ll all fit. That 140mm fan, which I figure is going to keep pulling the necessary air through the box, leaves one single millimetre against the CPU.
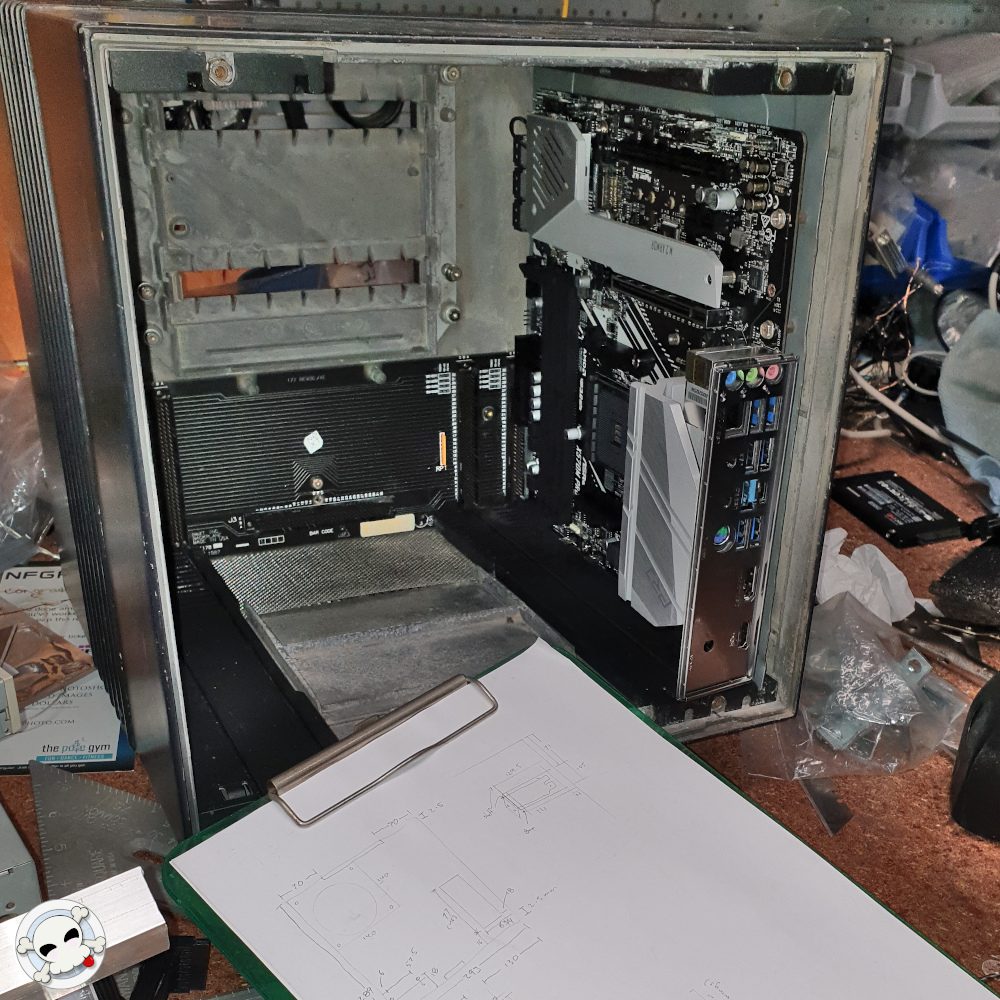
Anyway, this is all starting to look like it’ll fit. Here’s the work in progress.

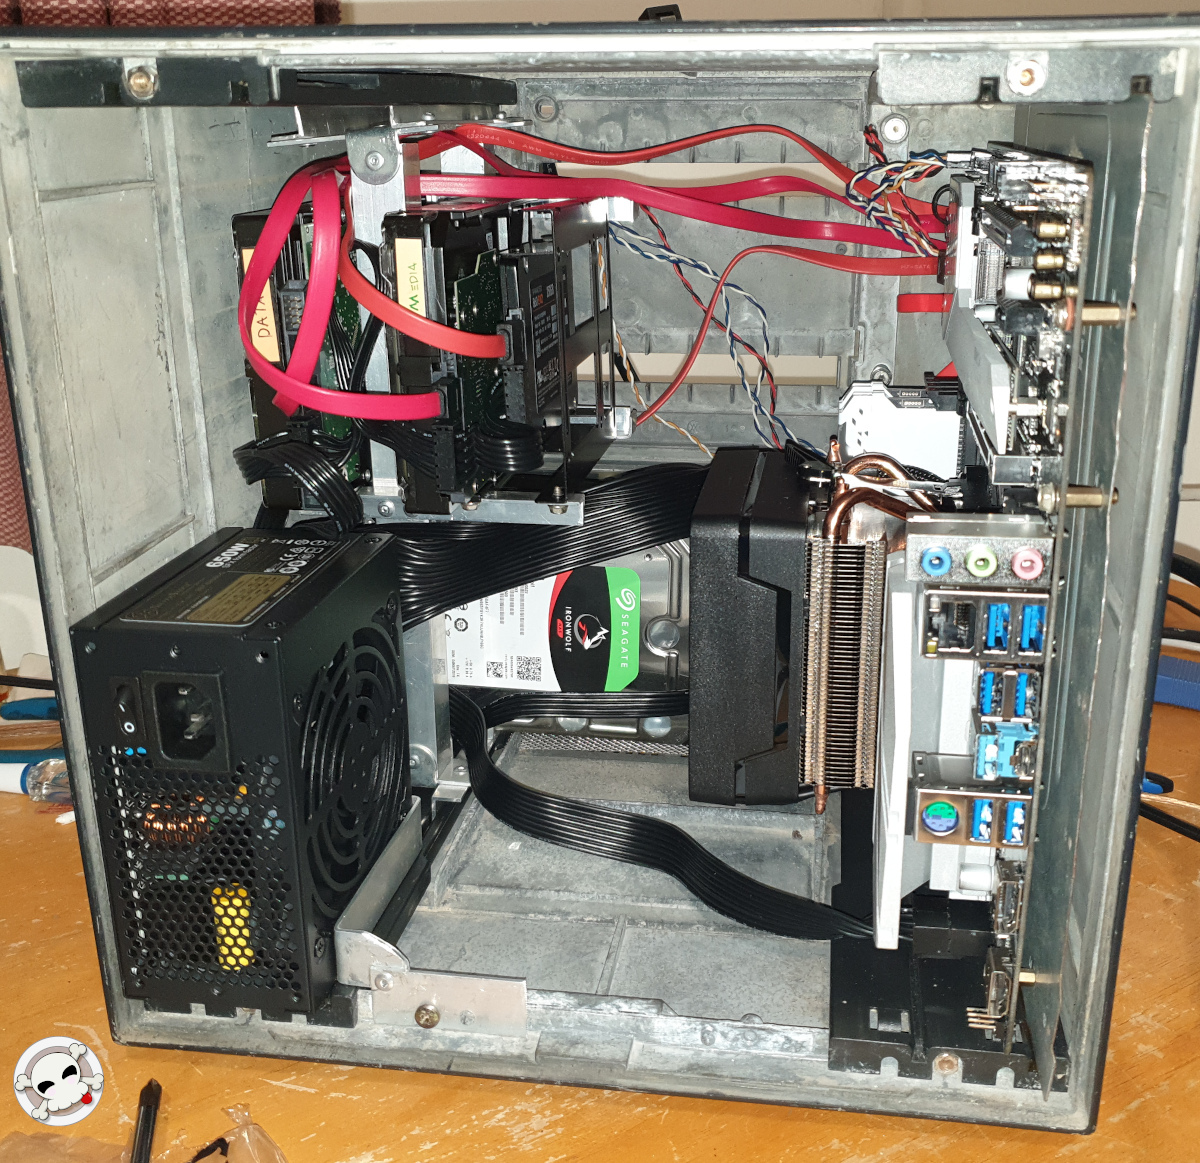
March 25, 2020
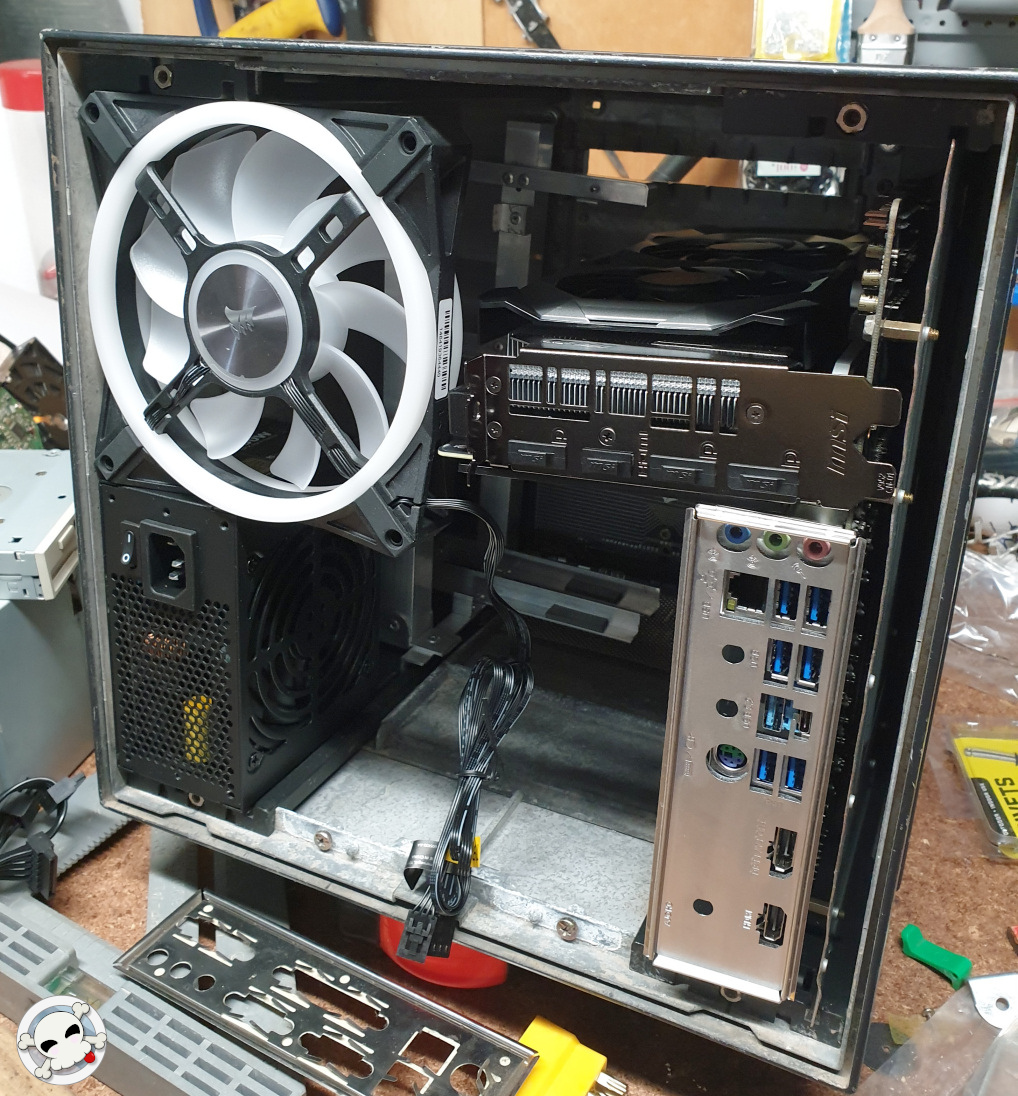
Everything but the CPU has arrived, and I pulled it all out of the boxes to see if it would actually fit as I hoped. There’s no space at all between the fan and PSU, but they slide together easily so this is good.
The video card is much taller (wider, in this build) than I expected, but to my delight the fan and card fit together with ~4mm to spare.
Tomorrow I’ll try to finish the drive rack assembly, and then I’ll start creating some cardstock panels to replicate the back panel dimensions and see if I can go ahead and order a laser-cut panel.
I’m also thinking to add a bracket to hold the power supply in place, and probably another one to hold the video card up when the rear panel is removed. You might be horrified the video card hanging at a steep angle… And yeah. It’s up against the fan in these shots, but the threat of gravity damage is real, so let’s avoid that.
Then the LED strips, the front USB panels… But that’s an ongoing process. Once the CPU arrives I can start using the machine as it is.
I’m excited. =)

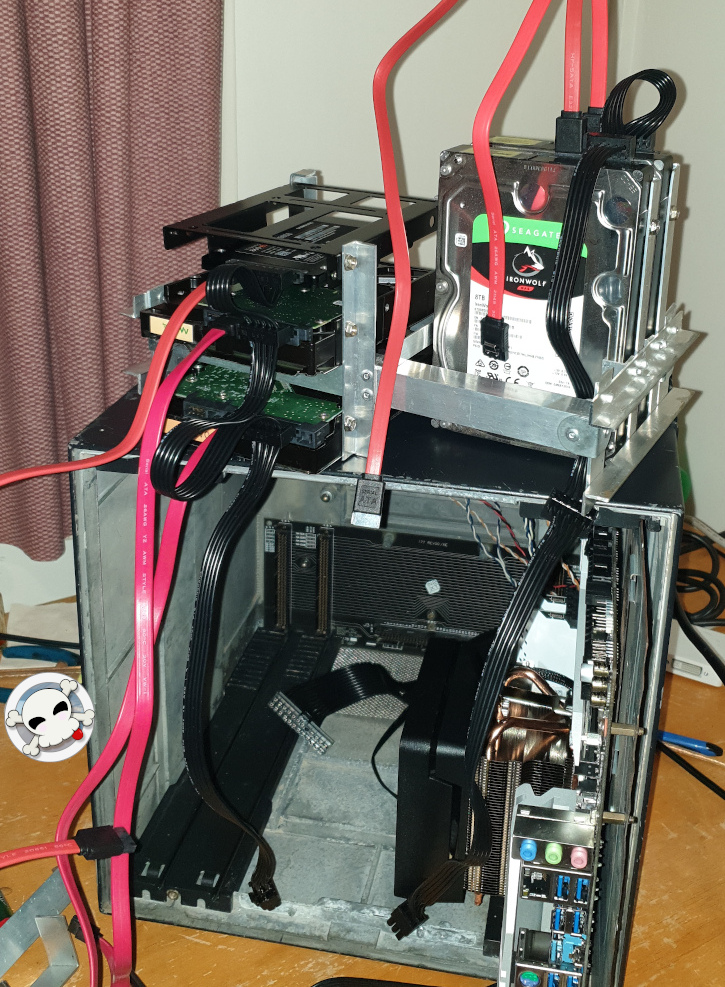
March 26, 2020
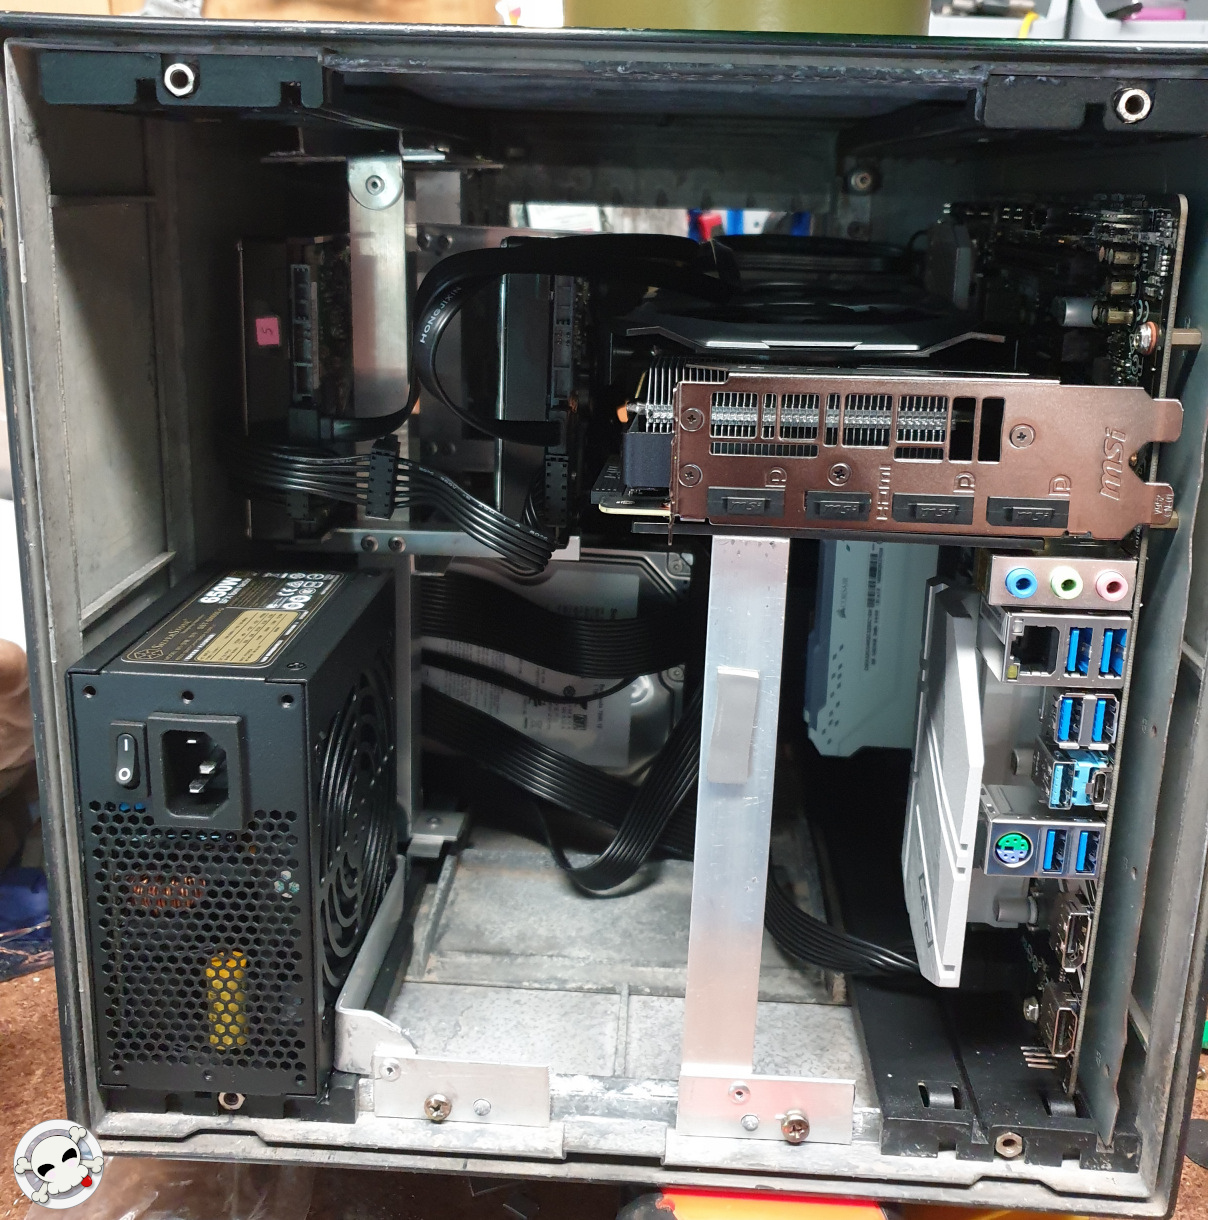
I wanted to be ready when the CPU arrives, so today I spent the whole day (in isolation of course!) cutting up aluminum bits. I made a frame for the PSU (so it stays in one place while I work on the rest of the machine) and a support column for the video card, so it stays where it should while the rear panel is off.
The NeXT chassis had two screws and guide bumps for the original PSU, and I re-used those for these two bits. They’re recessed into the cube a bit, so the rear panel will cover them up without running into them.
And then I ran all the wires to see how it fit. Bluntly, it fucking sucks. Since the PSU is at the entrance, all the cables are in the way, between the user and the drives, the motherboard, the video card. It’s a crazy tight fit, made worse by the Silverstone PSU’s very short ATX power cable.
But it all fits!! I’m super, super excited.
Well, except for the Corsair RGB strips. they’re all, at 30cm, way too long for the poor cube, so I have to get some shorter ones. =/
When the CPU arrives I can start using the machine. And from there I can work on the extra USB ports, and on the rear panel, power buttons, etc.

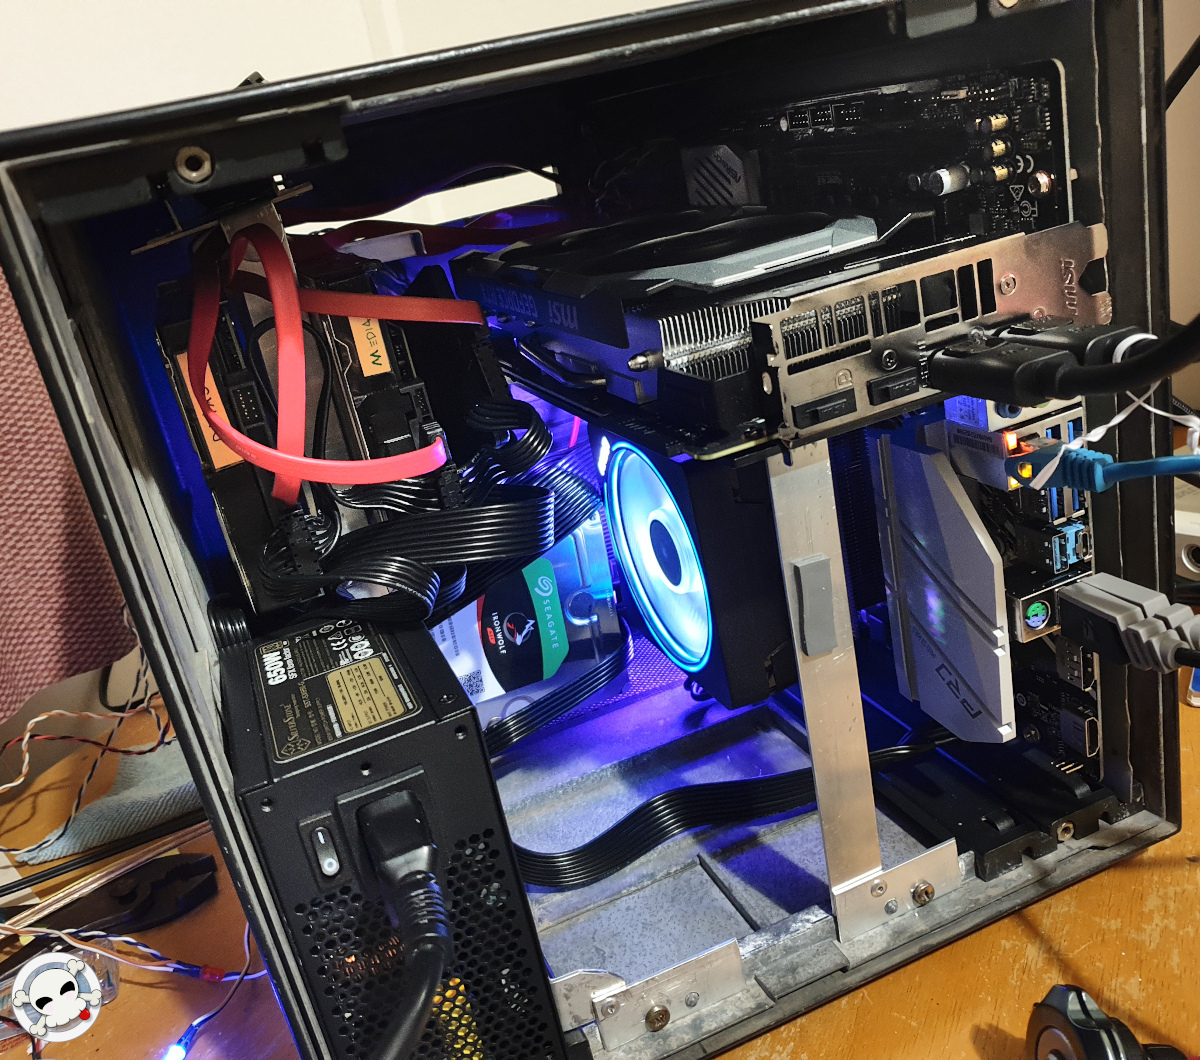
March 28, 2020
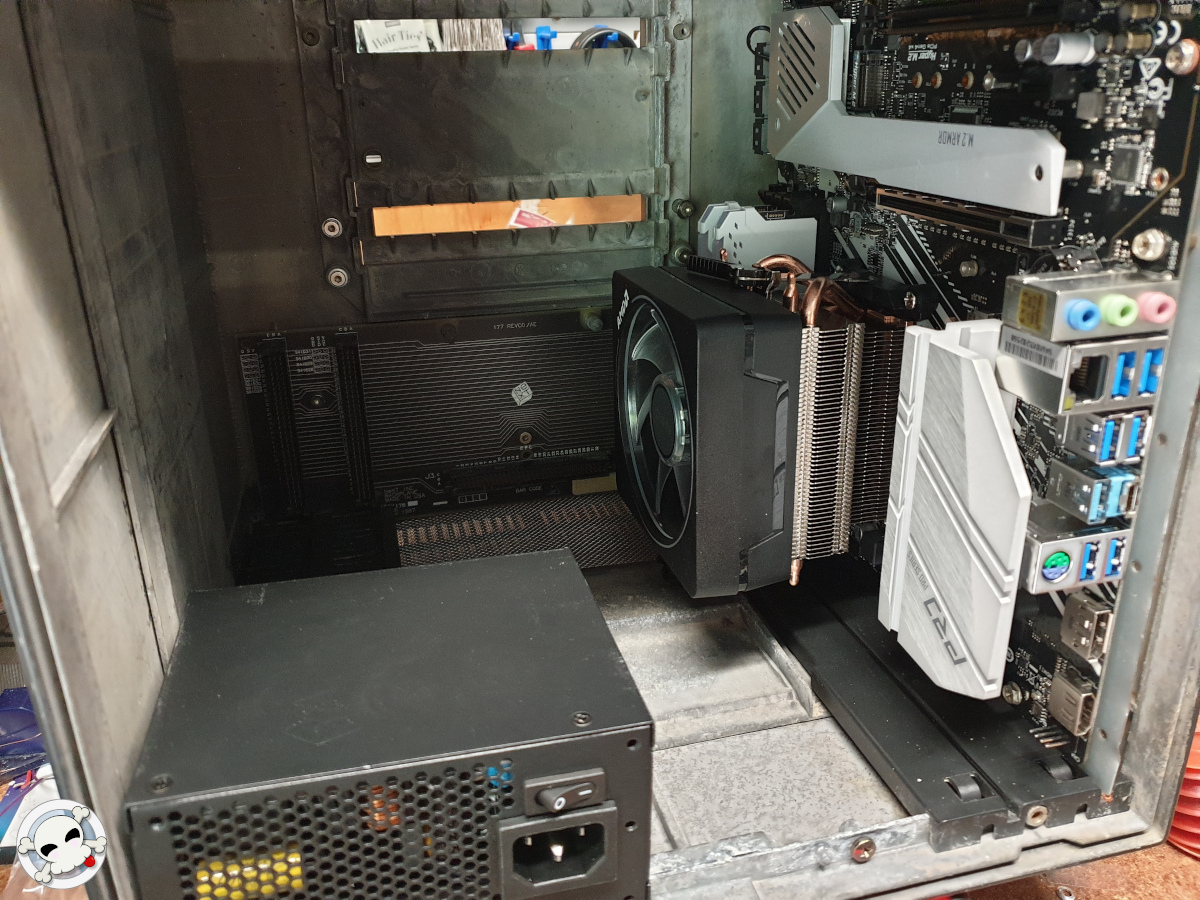
When the CPU arrived I started assembling things in earnest. And it mostly worked out perfectly, which was a giant thrill (and a relief). The CPU cooler left more room than I thought, and I think I will tip the PSU over into a horizontal position to make the wiring easier.
Since I don’t have the back panel finished yet, I installed a small bracket similar to the video card support to hold the PSU in place. It works really well.
Wiring is a massive problem. The ATX cable included with the Silverstone device is very short. The SATA cables are basically all over the place, and routing them cleanly is a challenge in this confined space.
The biggest surprise was that the video card power cables interfere with the rightmost upper HDD, so that’s gotta be scrapped. I’ve left an SSD just hanging in there for now, but no 3.5″ drive can occupy that space as designed. I may redesign the drive tower, we’ll see. For now, it works as well as I need it to.
In better news, everything seems solid and functional. No loose or wobbly bits and I think the airflow is going to work as planned. We’ll see when the rear panel is created. =)
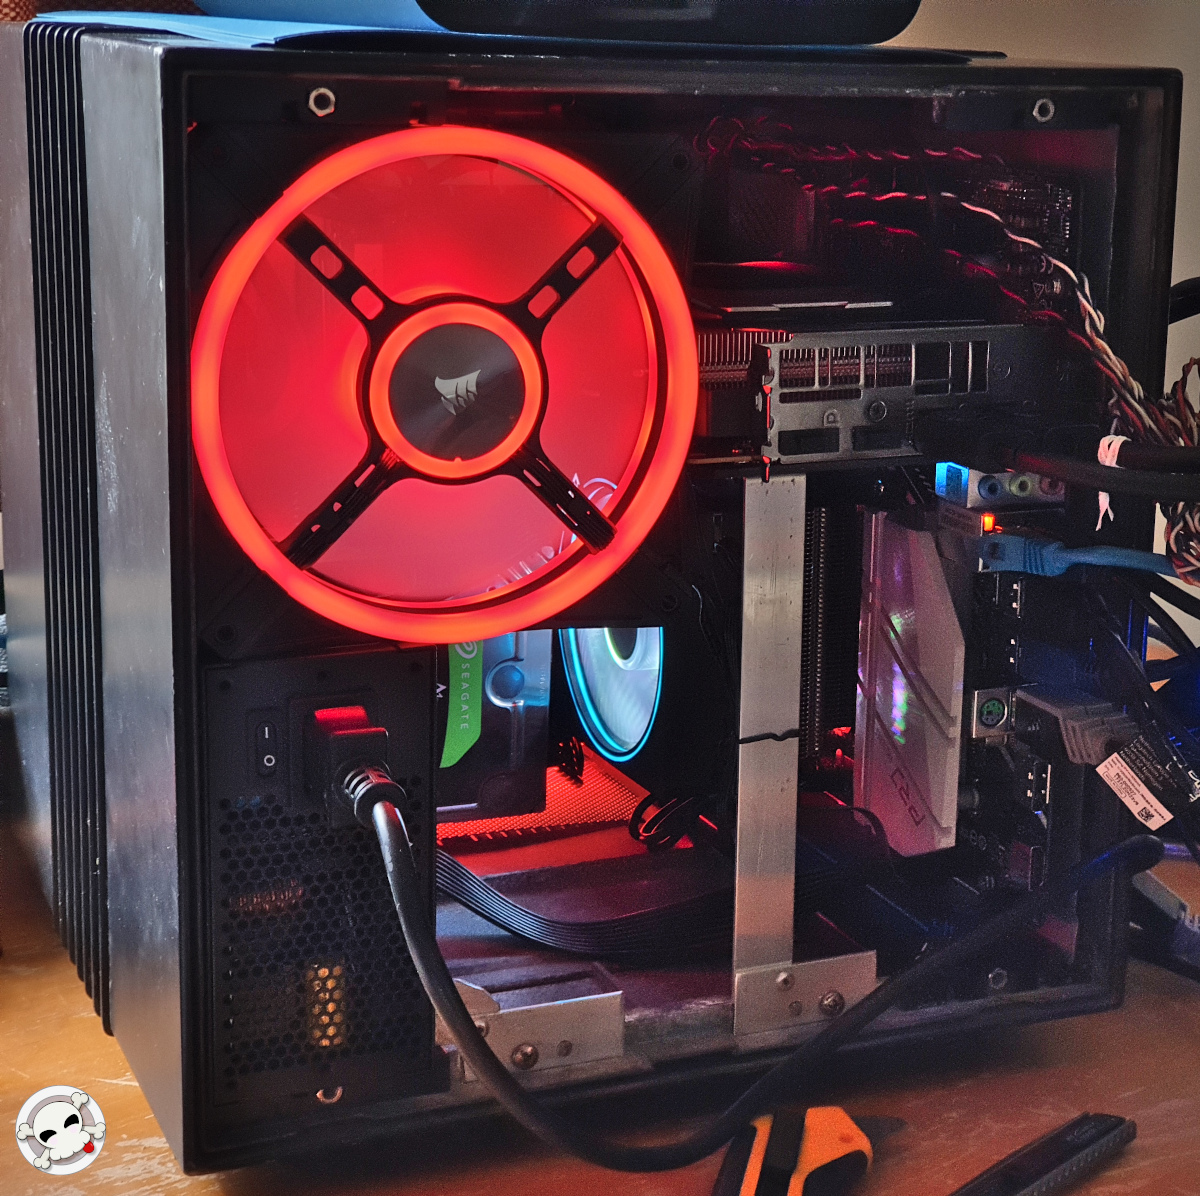
April 13, 2020
Well the covid thing is slowing down the whole world which means I’ve got lots of time to work on The Cube. And gosh, I’m lucky I started building it when I did. While agonizing over the CPU selection, during the initial order process, the price went up fifty bucks. I found it at another vendor, but their price went up after I ordered it. And so did everyone else’s. Because the whole world was working from home, demand skyrocketed. I saved several hundreds of dollars over the cost of ordering just 24 hours later, and hundreds more by mid March. Lucky!
I’ve started working on the rear panel design. After drafting it all up in Inkscape, I cut the pieces out of cardstock and aligned them to the case. Except for a small error on the placement of the ATX I/O panel, everything fit. I’m still waiting for some additional USB connectors, and I’m not 100% sure where the power button‘s going to go, but once those problems are solved I’ll be ordering a rear panel.
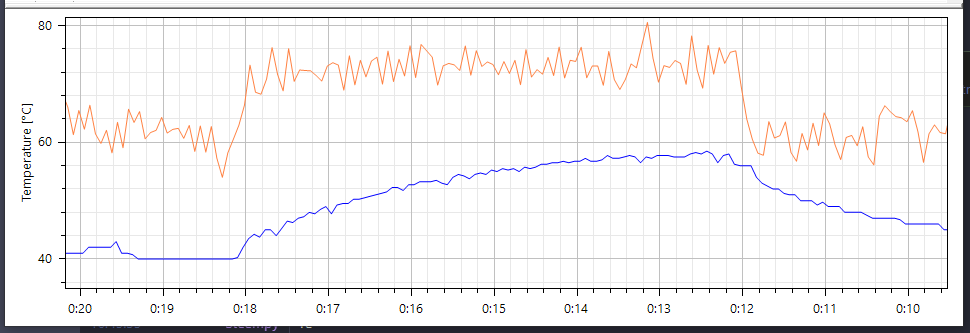
Someone asked about the cooling potential of the single 140mm fan, but I ran a lengthy photo rendering test and the temps peaked at acceptable limits. In further tests, nothing seems to stress the system out beyond a reasonable limit. The CPU and GPU max out at temps well within tolerances.
And I’m convinced I can add 1 or 2 more HDDs in there but I’m still headbashing the frame into shape. And I’m sort of toying with the idea of redoing the whole assembly. It’s not like I lack the spare time. =)
Nearly done, so much to do. =)
--NFG
[ May 19 2020 ]
| Next Post | Navigation | Previous Post |
|---|
Comments
NFG
Dec 27 2023
Nope! At the time I wasn’t happy with my aluminum cage, and I figured there was no point making it work when the case itself was corroding and in need of a paint job. So I backburnered it until a few weeks ago. I started learning to create things and 3D print them, so I’m going to re-do the drive cages and most of the mounts this way.
Watch for updates in the next few weeks!
Still need to get the case sorted tho. No one I’ve contacted is interested in helping me with it. Magnesium alloy is not a popular material, it seems.
Name:
Email:
Website:


Christian Schaller
Dec 16 2023